Adding Venues to a Plan
Adding venues to a plan is the foundation of distribution management in Mica. You can search and filter from your venue database, import venues in bulk, and manage them all within a single plan view.…
Adding venues to a plan is the foundation of distribution management in Mica. You can search and filter from your venue database, import venues in bulk, and manage them all within a single plan view. This article covers the full workflow: searching, filtering, importing, and bulk actions.
Searching for Venues
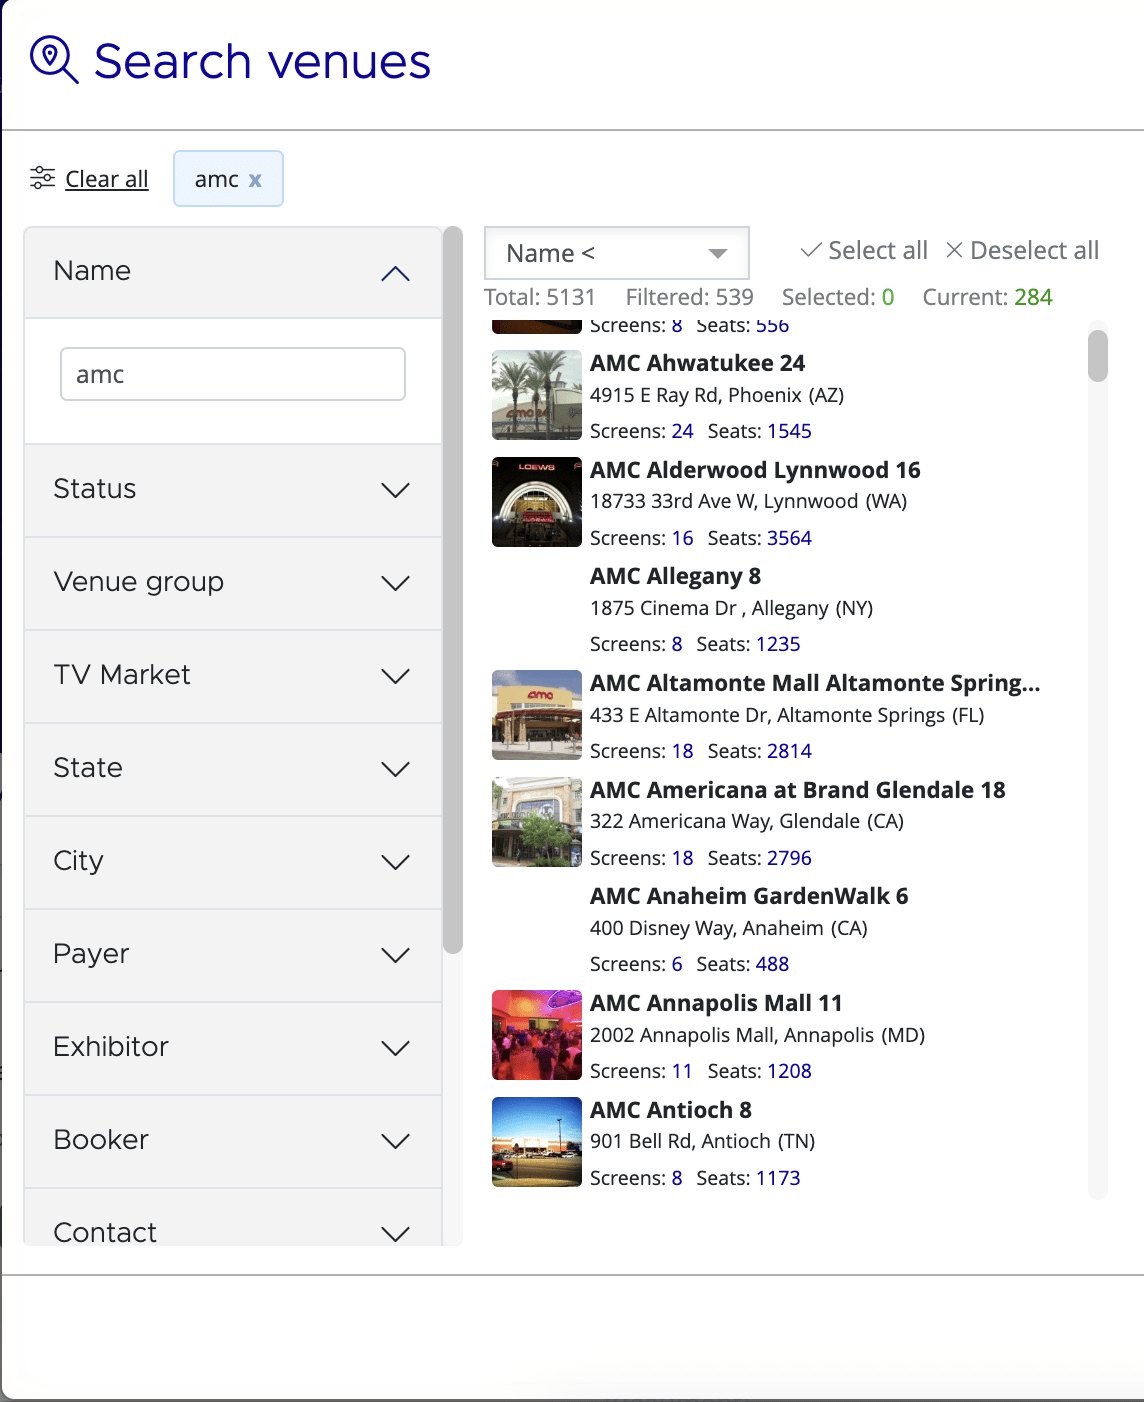
From your plan detail page, click the Add Venues button to open the Search Venues modal. This modal lets you filter venues from your entire database by multiple criteria before adding them to the plan.
Filter Options
The modal provides filters for: Name, Venue Group, State/Province, City, Payer, Exhibitor, Screens, Seats, Productions (filter by venues that played a specific production), Capabilities, TV Market, and Country. Use these filters alone or in combination to narrow your search results.
Map View
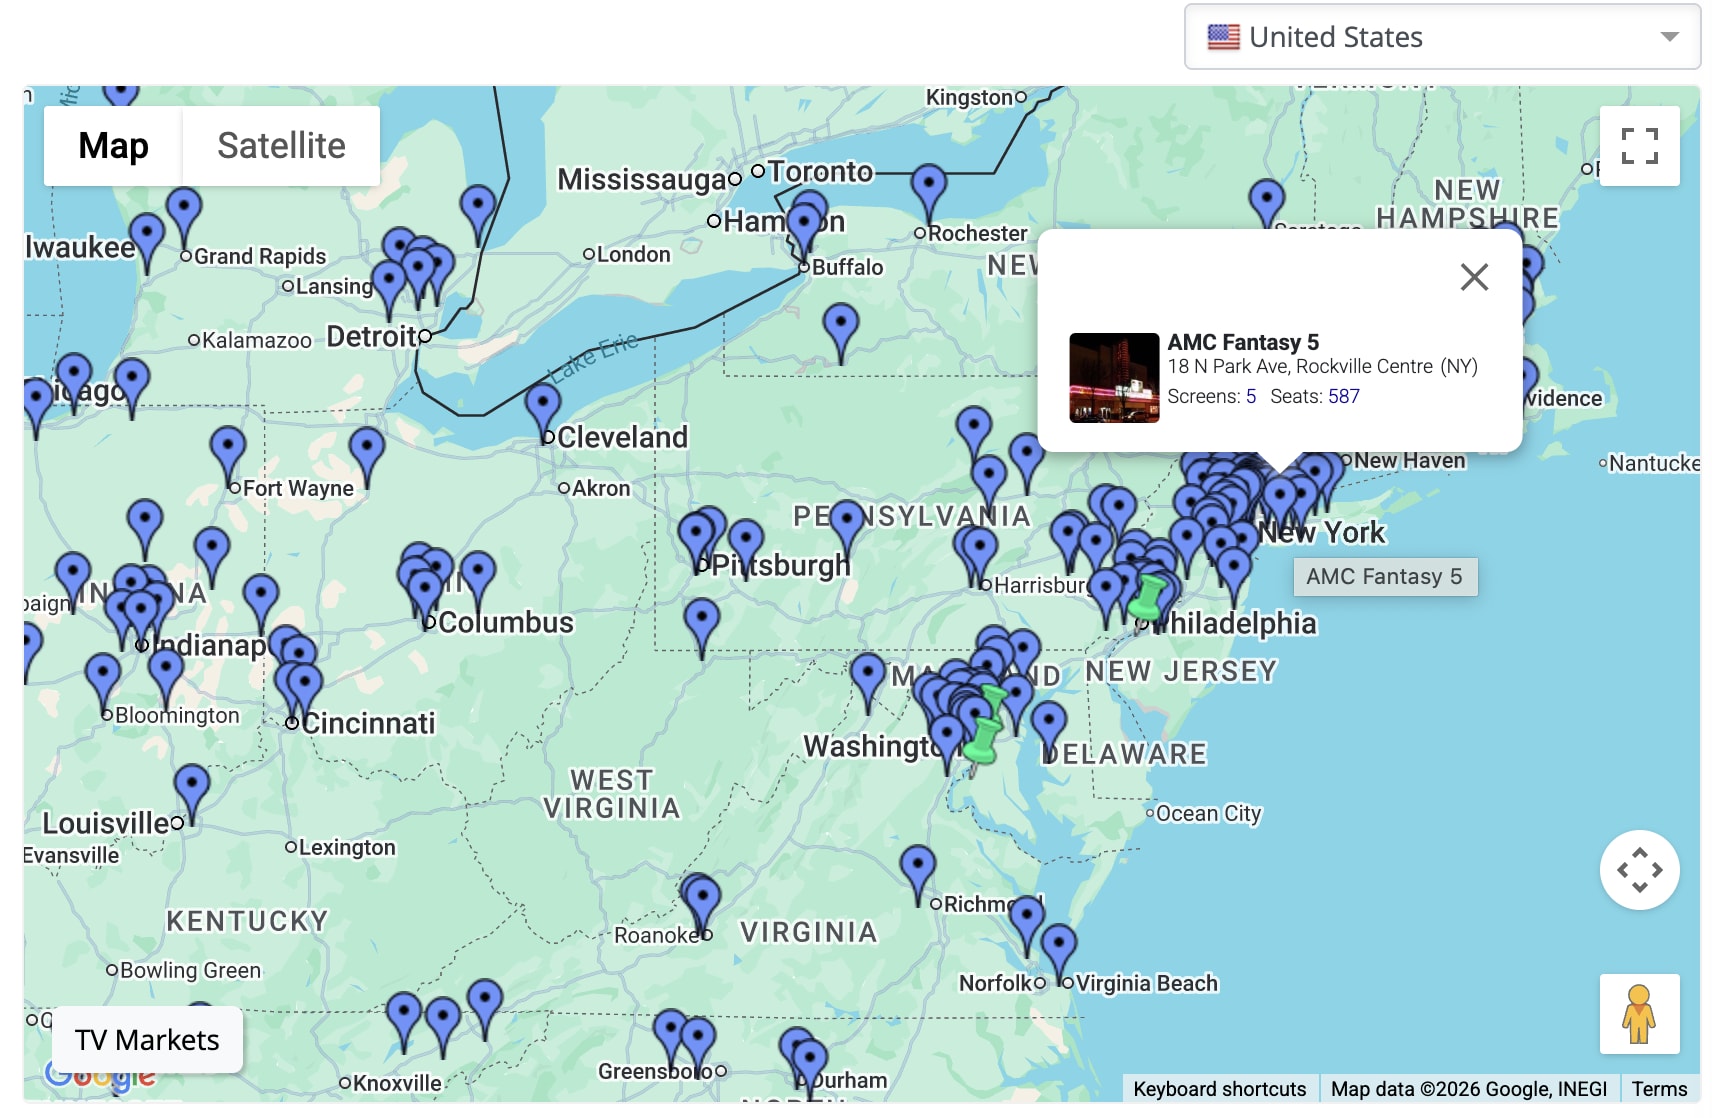
A map view is available showing venue locations with colour-coded markers. Blue markers indicate individual venues; the colours show their status relative to your plan: white for venues not yet targeted, green for venues already in the plan, and purple for other venues. Use the map to visualize geographic coverage or to select venues by clicking markers.
Adding Venues
Select one or more venues from the list or map. When ready, click the Add button to add your selection to the plan. The modal closes and your venues appear in the plan's venue list.
Importing Venues
For large plans where venue lists come from external systems, use the Import Venues button on the plan detail page. This bulk import feature accepts reference IDs from your external systems.
Paste your reference IDs (MaccsBox IDs, Rentrak IDs, or Exhibitor IDs) into the import dialog. Mica matches these IDs to venues in your database and adds them to the plan in a single operation. This approach is faster than searching and selecting venues individually when you're working with hundreds of venues.
If you import IDs for venues that are already in your plan, Mica won't duplicate them — it selects them instead. This is handy when you want to bulk-update a specific group of venues. For example, if an exhibitor sends you a list of sites they want to book, paste those IDs into the import dialog and Mica will select them in your venue list, ready for you to apply a status change, assign terms, or take any other bulk action.
The Venue List
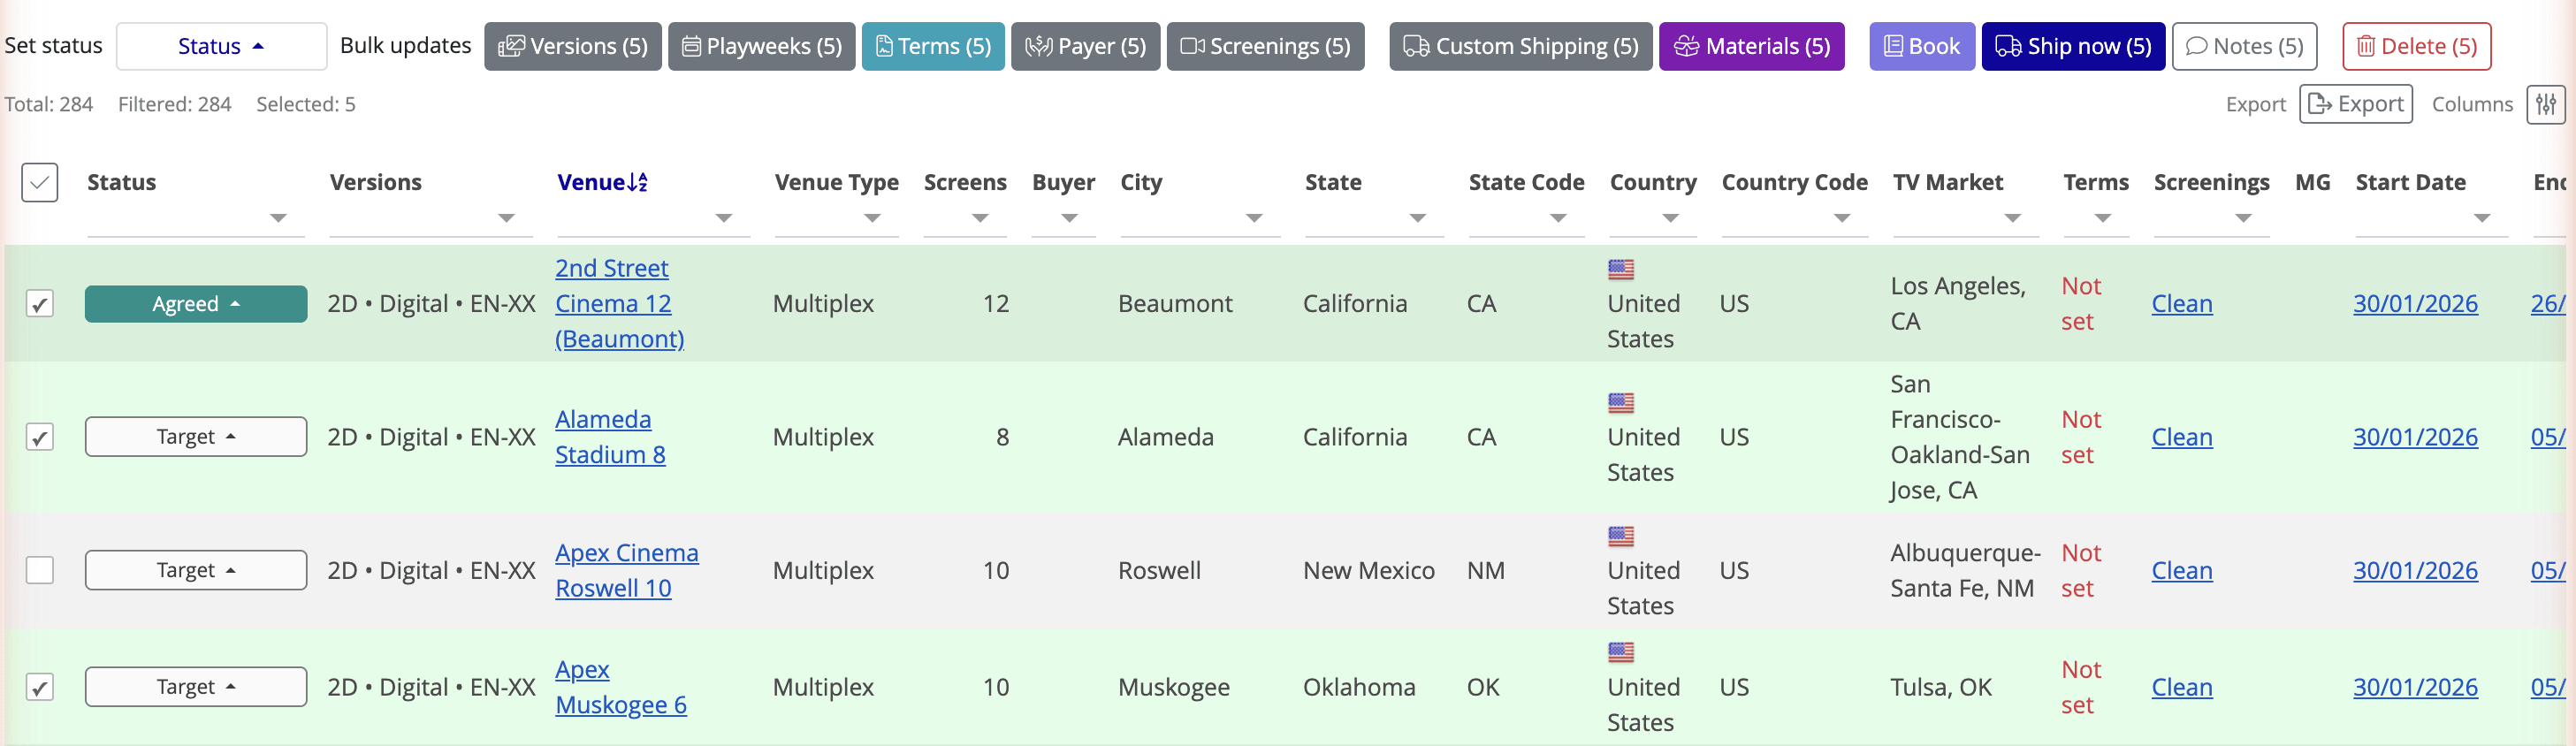
Once venues are added to your plan, they appear in the venue list with detailed columns for tracking and management. The standard columns include: Status, Versions, Venue, Venue Type, Screens, Buyer, City, State, Country, TV Market, Terms, Screenings, MG, Start Date, End Date, Negotiation Notes, Payer, Payer status, Shippings, KDM Coverage, DCP Coverage, and Booker(s).
Column Visibility
Not every column is relevant to every workflow. Click the Columns button above the venue list to show or hide columns. Your column preferences are saved for future use.
Filtering and Sorting
Filter the venue list by any column to focus on specific subsets of venues. For example, filter by Status to see only venues in negotiation, or filter by City to show venues in a particular region. Column headers show the total count, filtered count, and selected count so you always know how many venues you're working with.
Bulk Actions
Select one or more venues in the list to reveal the action bar. This bar provides bulk actions to update all selected venues at once:
- Set status — Change venue status (Target, Negotiation, Requested, Agreed, Cancelled, Declined)
- Versions — Assign versions to all selected venues
- Playweeks — Set playweek dates
- Terms — Assign terms
- Payer — Assign payer
- Screenings — Set number of screenings
- Custom Shipping — Set delivery date and method
- Materials — Assign materials
- Book — Create bookings (see Booking Venues for details)
- Ship now — Order DCPs (see Shipping Content for details)
- Notes — Add negotiation notes
- Delete — Remove venues from the plan
Managing Venue Status
Venue status tracks your distribution progress through the negotiation and booking lifecycle. The typical progression is: Target → Negotiation → Requested → Agreed → Booked. Venues can also move to Cancelled or Declined at any stage.
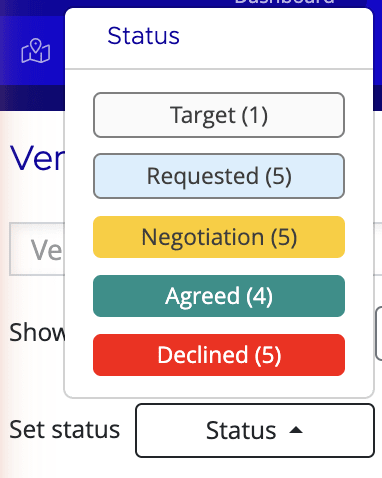
Change status using the Set status action from the bulk action bar, or click on an individual venue's status field to change it inline. Status changes can trigger automated shipping rules if you've configured them for your plan.
If you need assistance with any aspect of Mica, we're here to help:
Contact your Mica system administrator for organisation-specific questions or access issues
OR
Reach out to the Mica support team at support.mica@maccs.com
How did we do?
Configuring a Plan