Configuring a Plan
Configuring a Plan. A plan is your central workspace for managing a film release to venues. It's where you set distribution targets, negotiate bookings, track venue progression, and optionally automa…
Configuring a Plan
A plan is your central workspace for managing a film release to venues. It's where you set distribution targets, negotiate bookings, track venue progression, and optionally automate the ordering of physical materials like posters. This article covers creating a plan, configuring shipping rules, and navigating the plan list and detail pages.
What Is a Plan?
A plan tracks the distribution of one production's release to venues for a specific playweek. As you work through the sales process, venues move through a progression of statuses: Target → Negotiation → Requested → Agreed → Booked. You can also mark venues as Declined or Cancelled. Plans give you a bird's-eye view of where all your venues stand and help you manage the logistics of shipping materials when needed.
You can create more than one plan per production, and each plan can include venues across multiple countries. How you organise your plans is entirely up to you — some distributors prefer one plan per territory, others put everything into a single plan, and others manage pre-release or private screenings in a separate plan. Choose whatever structure works best for your team.
Creating a Plan
Navigate to Sales → Plans, then click Add Plan. The modal will open with the following fields:
- Production (required) — Select the production this plan is for from the dropdown.
- Description — Optional text field to add notes about the plan (e.g. "UK theatrical release").
- Playweek — The release date.
- Goal — The target number of venues you want to book. Defaults to 0.
- Comp. Title(s) or Similar Production(s) — Dropdown to select comparable titles for reference. This field is called "Comp. Title(s)" if your account has a Numero subscription; otherwise it appears as "Similar Production(s)". You can select up to 3 titles.
- Shipping rule — Toggle to Yes if you want to automatically order physical materials when venues reach a certain status.
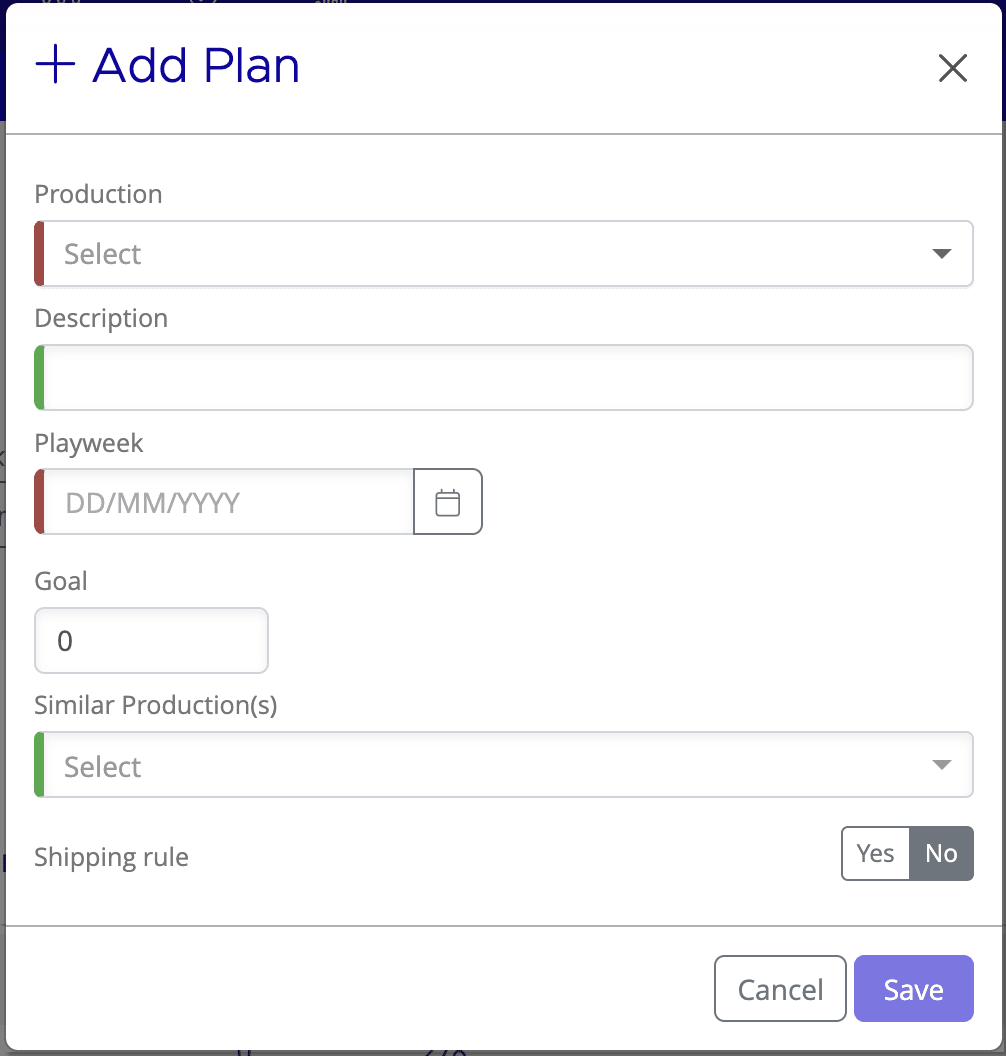
Once you've filled in the required fields, click Create. If you've toggled the shipping rule to Yes, you'll configure those settings in the next step.
Shipping Rules
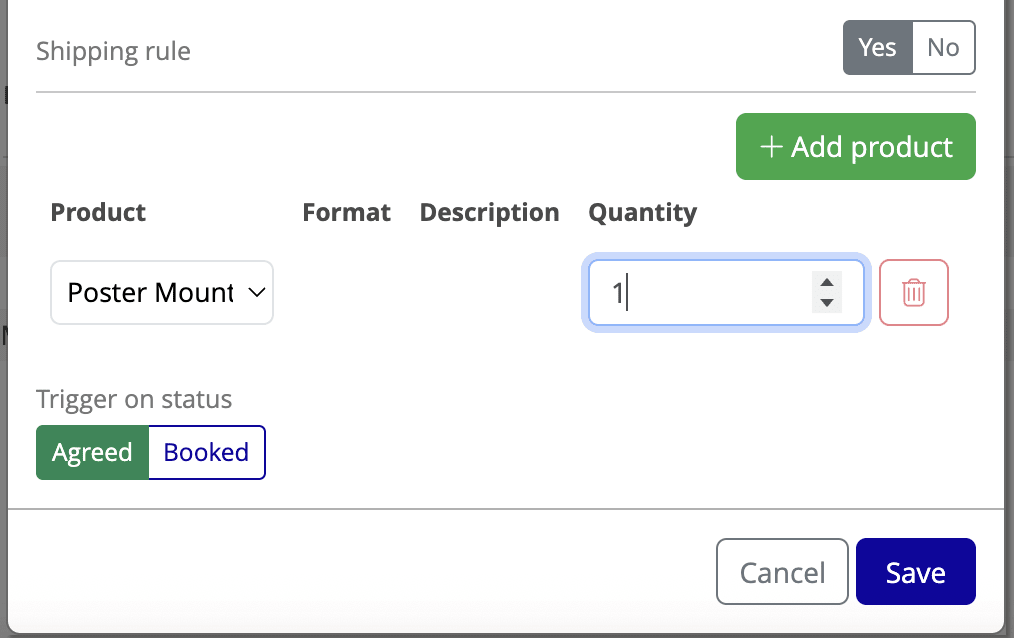
Shipping rules automate the ordering of physical materials (such as one-sheet posters) when a venue's status changes to a trigger point. This saves time and ensures consistent ordering across your venues.
Configuring a Shipping Rule:
- In the Add Plan modal (or Edit Plan modal), toggle Shipping rule to Yes. The configuration section will expand.
- Select one or more Product type(s) from the dropdown (e.g. One-Sheet, Quad, etc.).
- Enter the Quantity for each product type.
- Choose a Trigger status — either Agreed or Booked. Materials will be ordered automatically when a venue reaches this status.
- Click Create or Update to save.
The Plans List
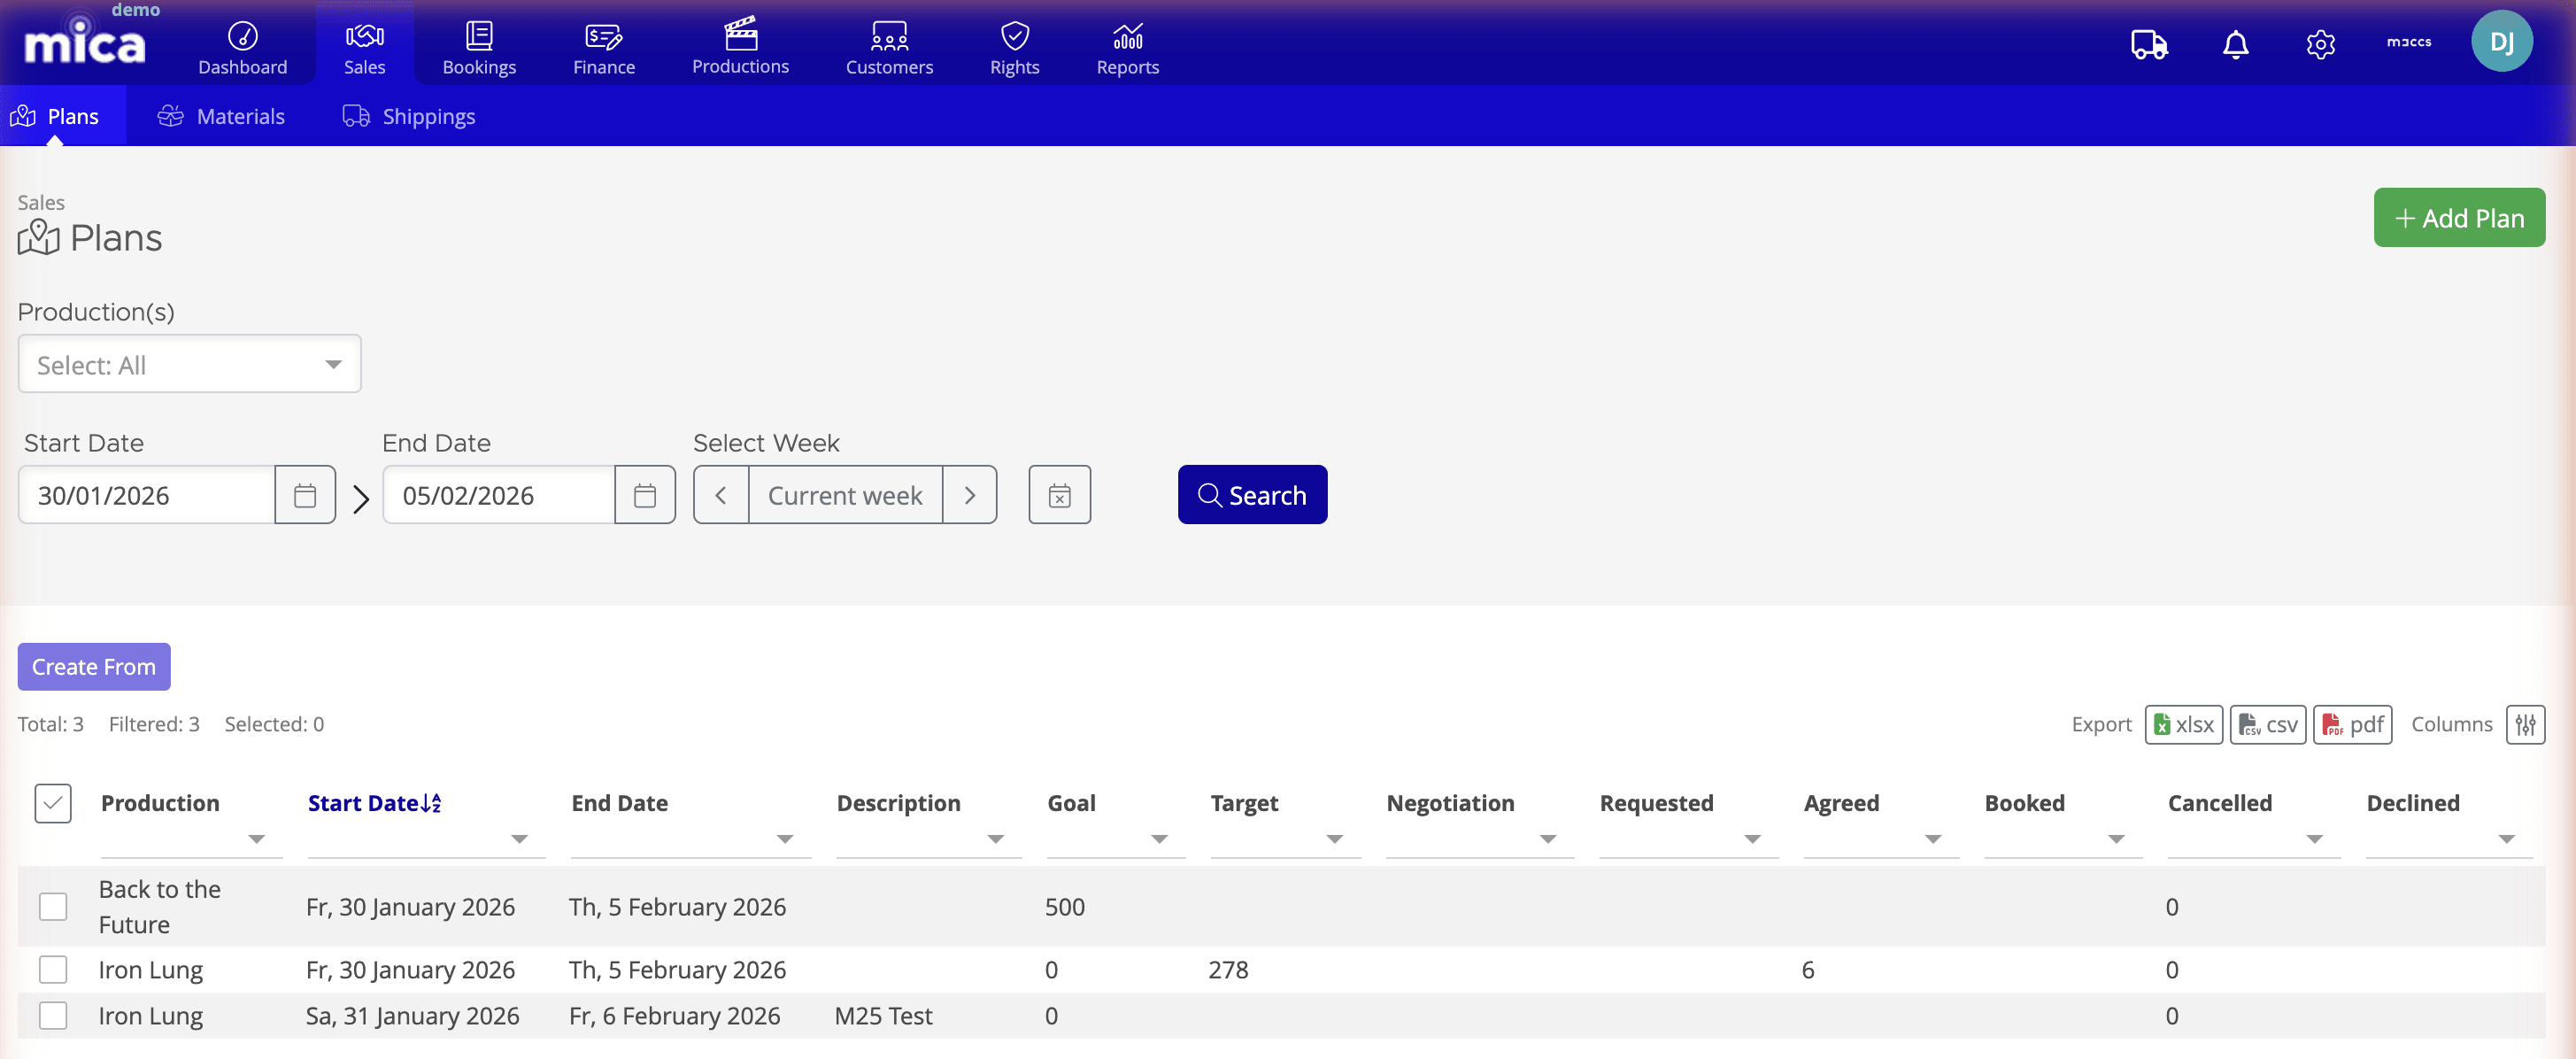
From Sales → Plans, you'll see a table of all your plans. Use the tabs at the top to switch between Plans, Materials, and Shippings views.
Filtering your plans:
- Production(s) — Filter by one or more productions.
- Start Date and End Date — Narrow by release date range.
- Select Week — Jump to a specific week using the week navigator, or click Current week to view this week's plans.
Columns displayed: Production, Start Date, End Date, Description, Goal, and count columns for each venue status (Target, Negotiation, Requested, Agreed, Booked, Cancelled, Declined).
Exporting: Click the export icon to download your plan data as xlsx, csv, or pdf.
Creating a plan from an existing one: Select one or more plans and click Create From to duplicate them as a template. This is useful for similar releases or repeated distribution strategies.
The Plan Detail Page
Click on a plan in the list to open its detail page. This page is your command centre for the plan and its venues.
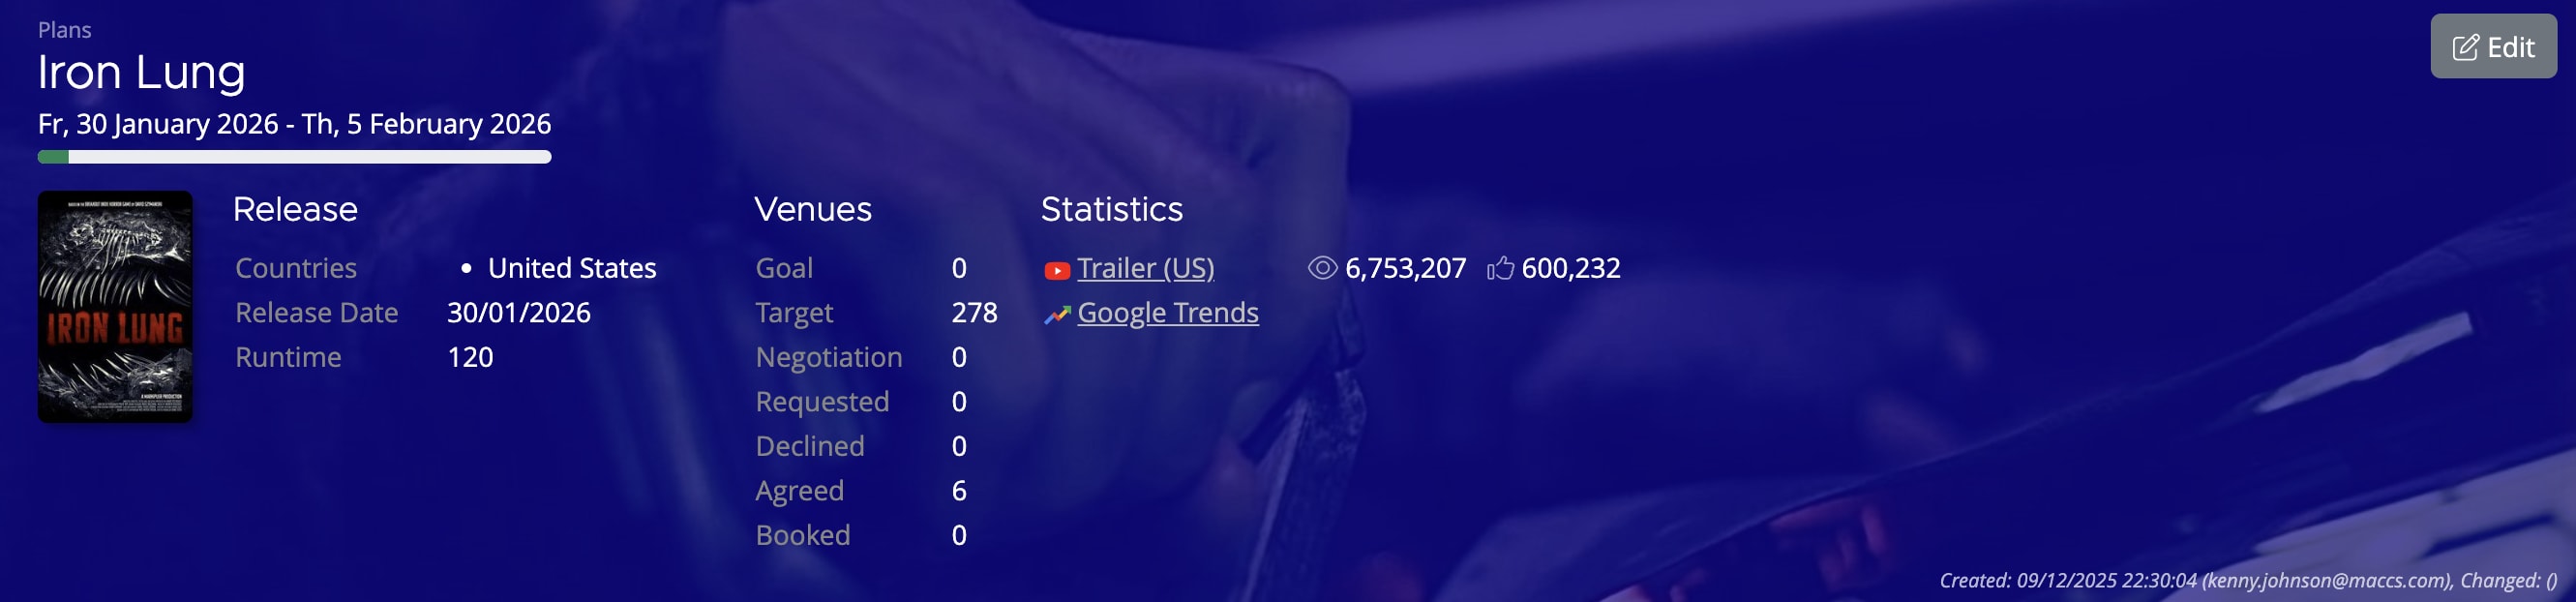
Header section: Shows the production name, release date range, and an Edit button to modify plan settings.
Release info: Lists the countries where the production is releasing, the official release date, and runtime.
Summary statistics bar: Displays your Goal and current counts for each venue status. This gives you a quick snapshot of your progress at a glance.
Additional sections:
- Statistics — Shows trailer view data and a link to Google Trends for the production.
- Metadata — Displays who created the plan and when it was last changed.
- Venues — Listed below the header (covered in the "Adding Venues to a Plan" article).
Editing a Plan
To modify an existing plan, open the plan detail page and click the Edit button in the header. You can update any field (Description, Playweek, Goal, Comp. Title(s), and Shipping rules). Changes are saved immediately when you click Update.
If you need assistance with any aspect of Mica, we're here to help:
Contact your Mica system administrator for organisation-specific questions or access issues
OR
Reach out to the Mica support team at support.mica@maccs.com
How did we do?
Adding Venues to a Plan
Creating Bookings via Plans