Managing Productions and Releases
Create and manage productions and releases in Mica. Covers the production-version-release hierarchy, adding new films, the production detail page, creating territory-specific releases with licensing and rating details, and importing promotional data from providers.
Productions are the foundation of your distribution workflow in Mica. Every film starts as a production, which holds all versions, releases, and promotional data. This guide covers how to create productions, add releases for different territories, and import promotional materials.
Table of Contents
- Understanding the Hierarchy
- Browsing Productions
- Creating a Production
- The Production Detail Page
- Creating a Release
- Importing Promotional Data
Understanding the Hierarchy
Mica organises film content into three levels:
- Production — the film itself, including its title, release date, runtime, and genre. A production holds all versions and releases.
- Version — a specific format of the film, defined by its media type, dimension, audio language, subtitles, sound system, and special features (e.g. "2D · Digital · EN · 7.1 · Dolby Vision").
- Release — a territory-specific instance of the production, with its own release date, licensor, rating, and distribution license period. Each release has one or more versions assigned to it.
You create versions at the production level, then assign them to individual releases. A single version can be shared across multiple territory releases. For detailed guidance on setting up versions and configuring DCP/KDM shipping, see Setting Up Versions, Vendors, and Shipping.
Browsing Productions
To view your productions, navigate to Productions in the top menu bar. The Productions page displays all films in your catalogue, with search and filter options to find specific titles.
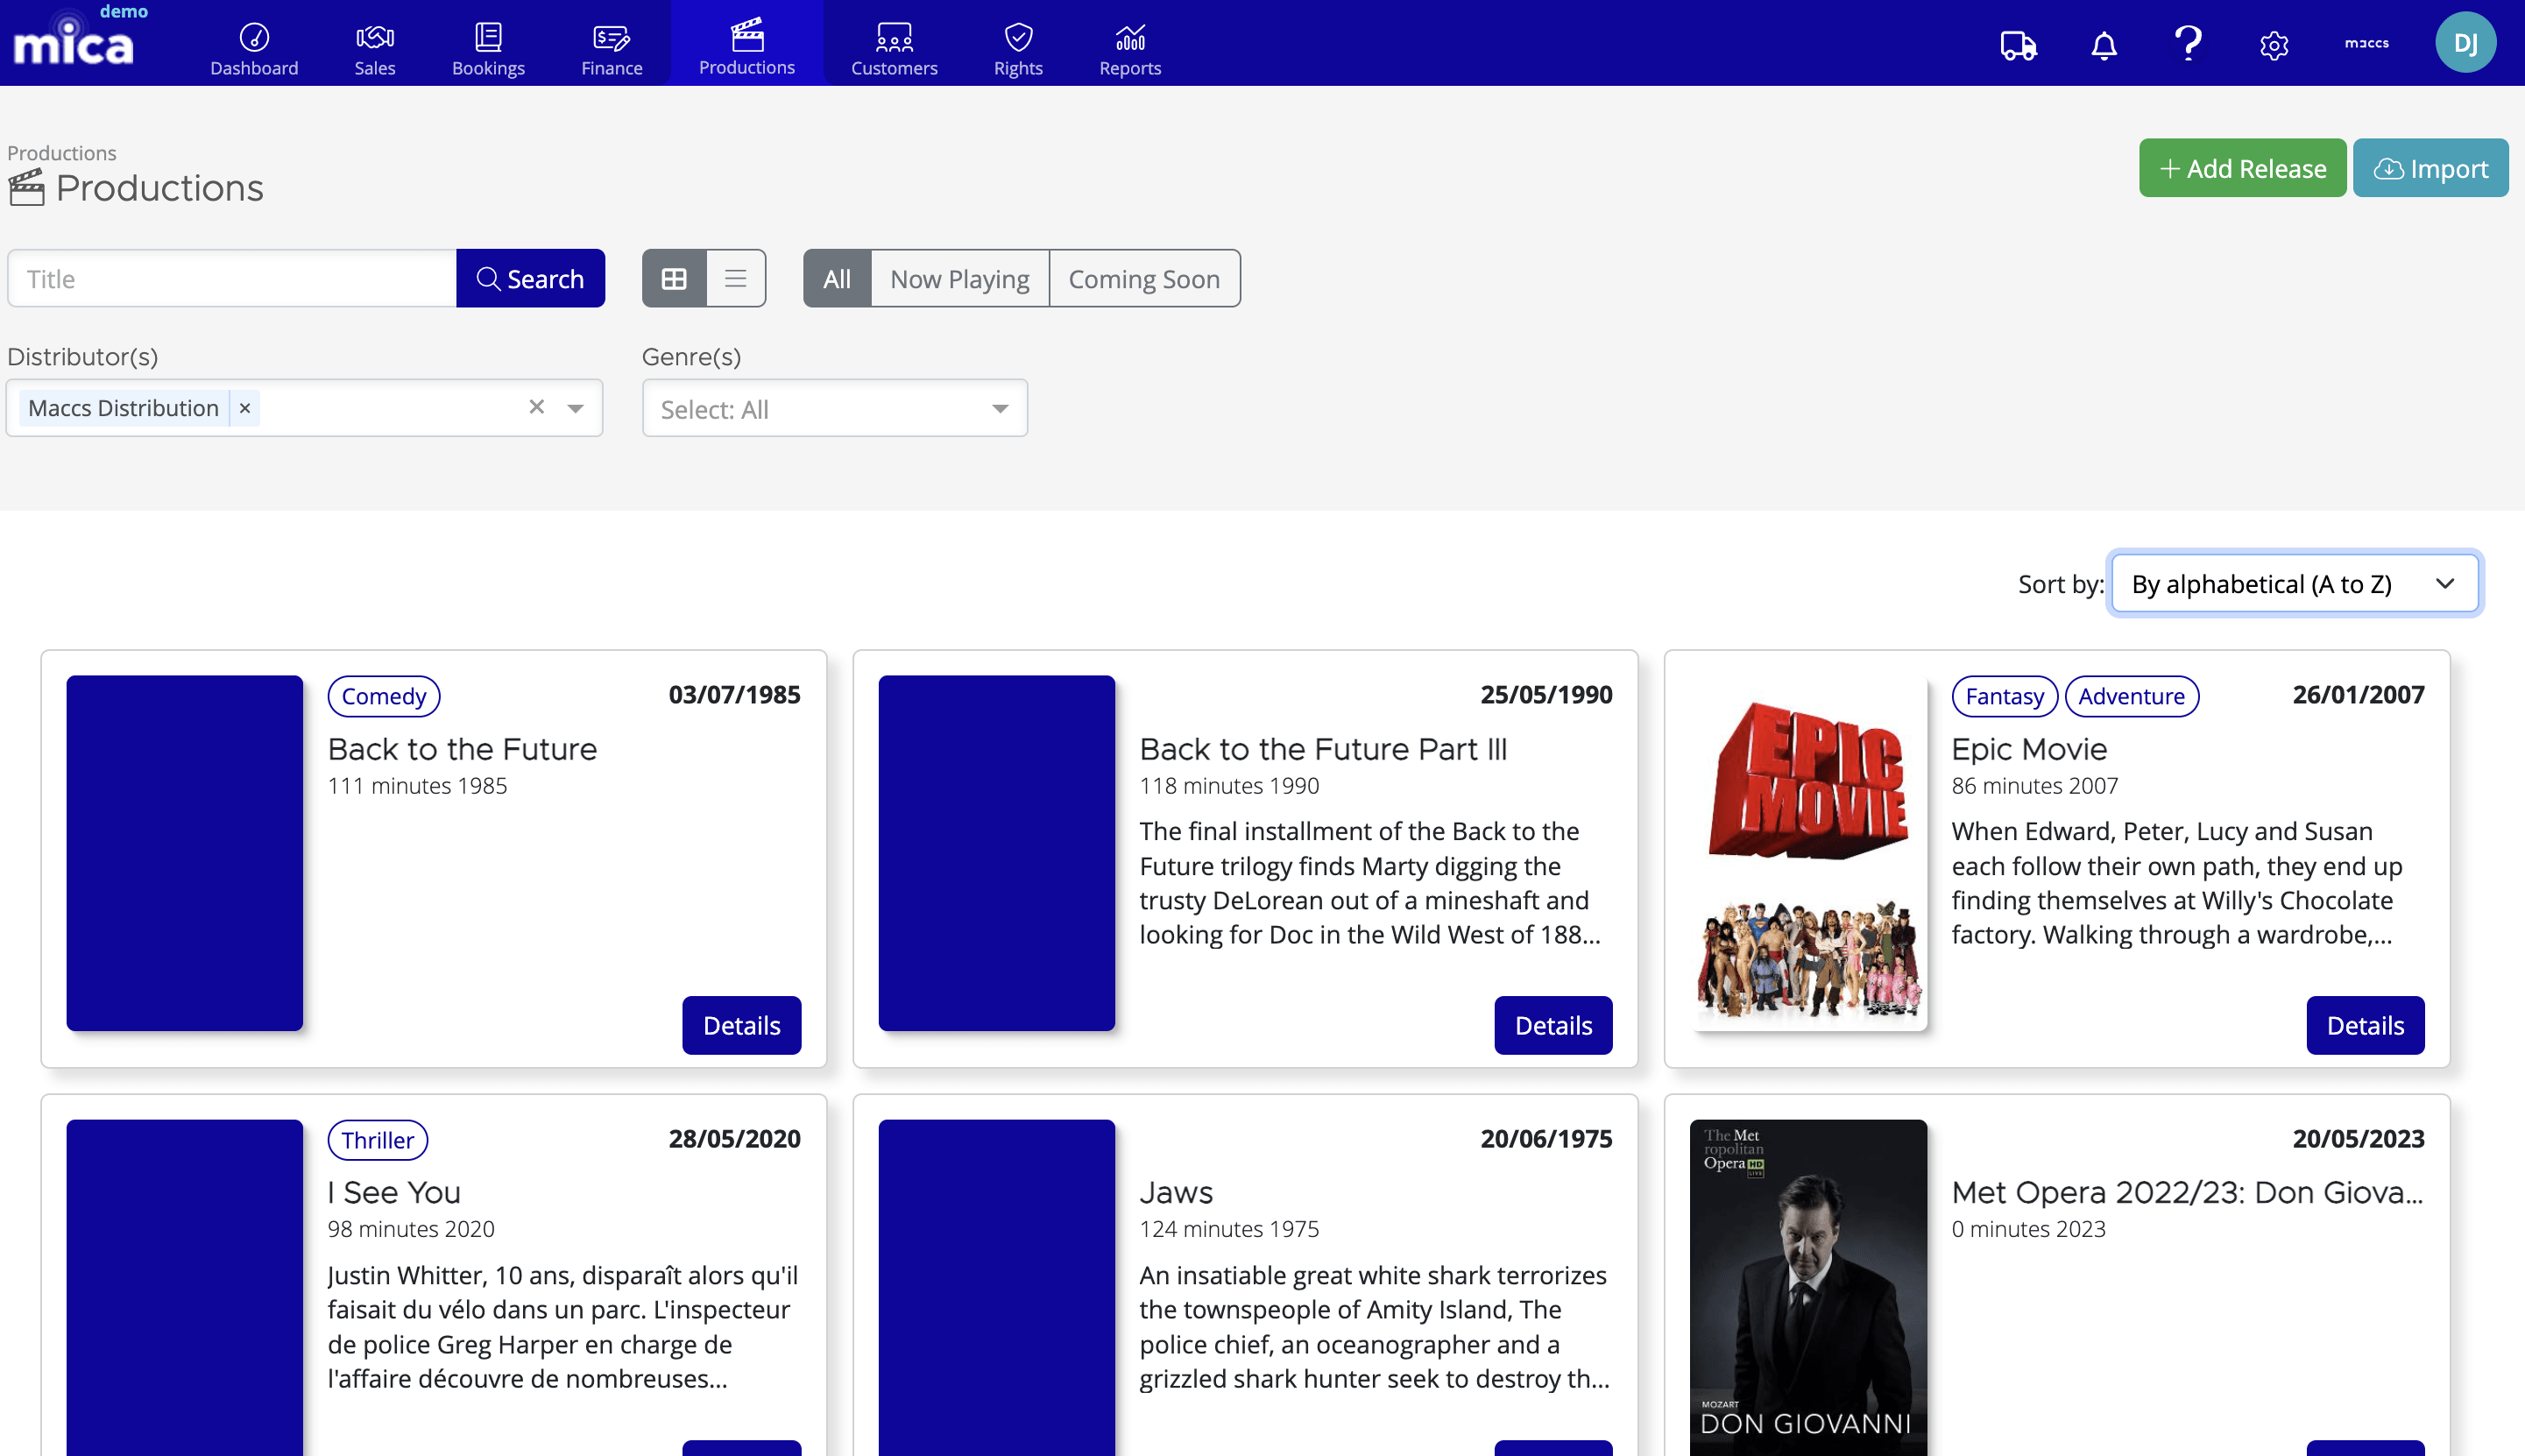
Click any production to open its detail page, or use the + Add Release button on the dashboard to start creating a new production and release in one step.
Creating a Production
To add a new film to Mica:
- Click the + Add Release button on the dashboard, or navigate to Productions and click Add
- Fill in the production details in the Add Production dialog
- Click Save
The Add Production form includes:
- Title — the film's name as it should appear across Mica
- Releasedate — the primary release date for the production
- Runtime — the film's duration in minutes
- Genre(s) — one or more genres (e.g. Documentary, Action, Drama). Select from the dropdown or type to search.
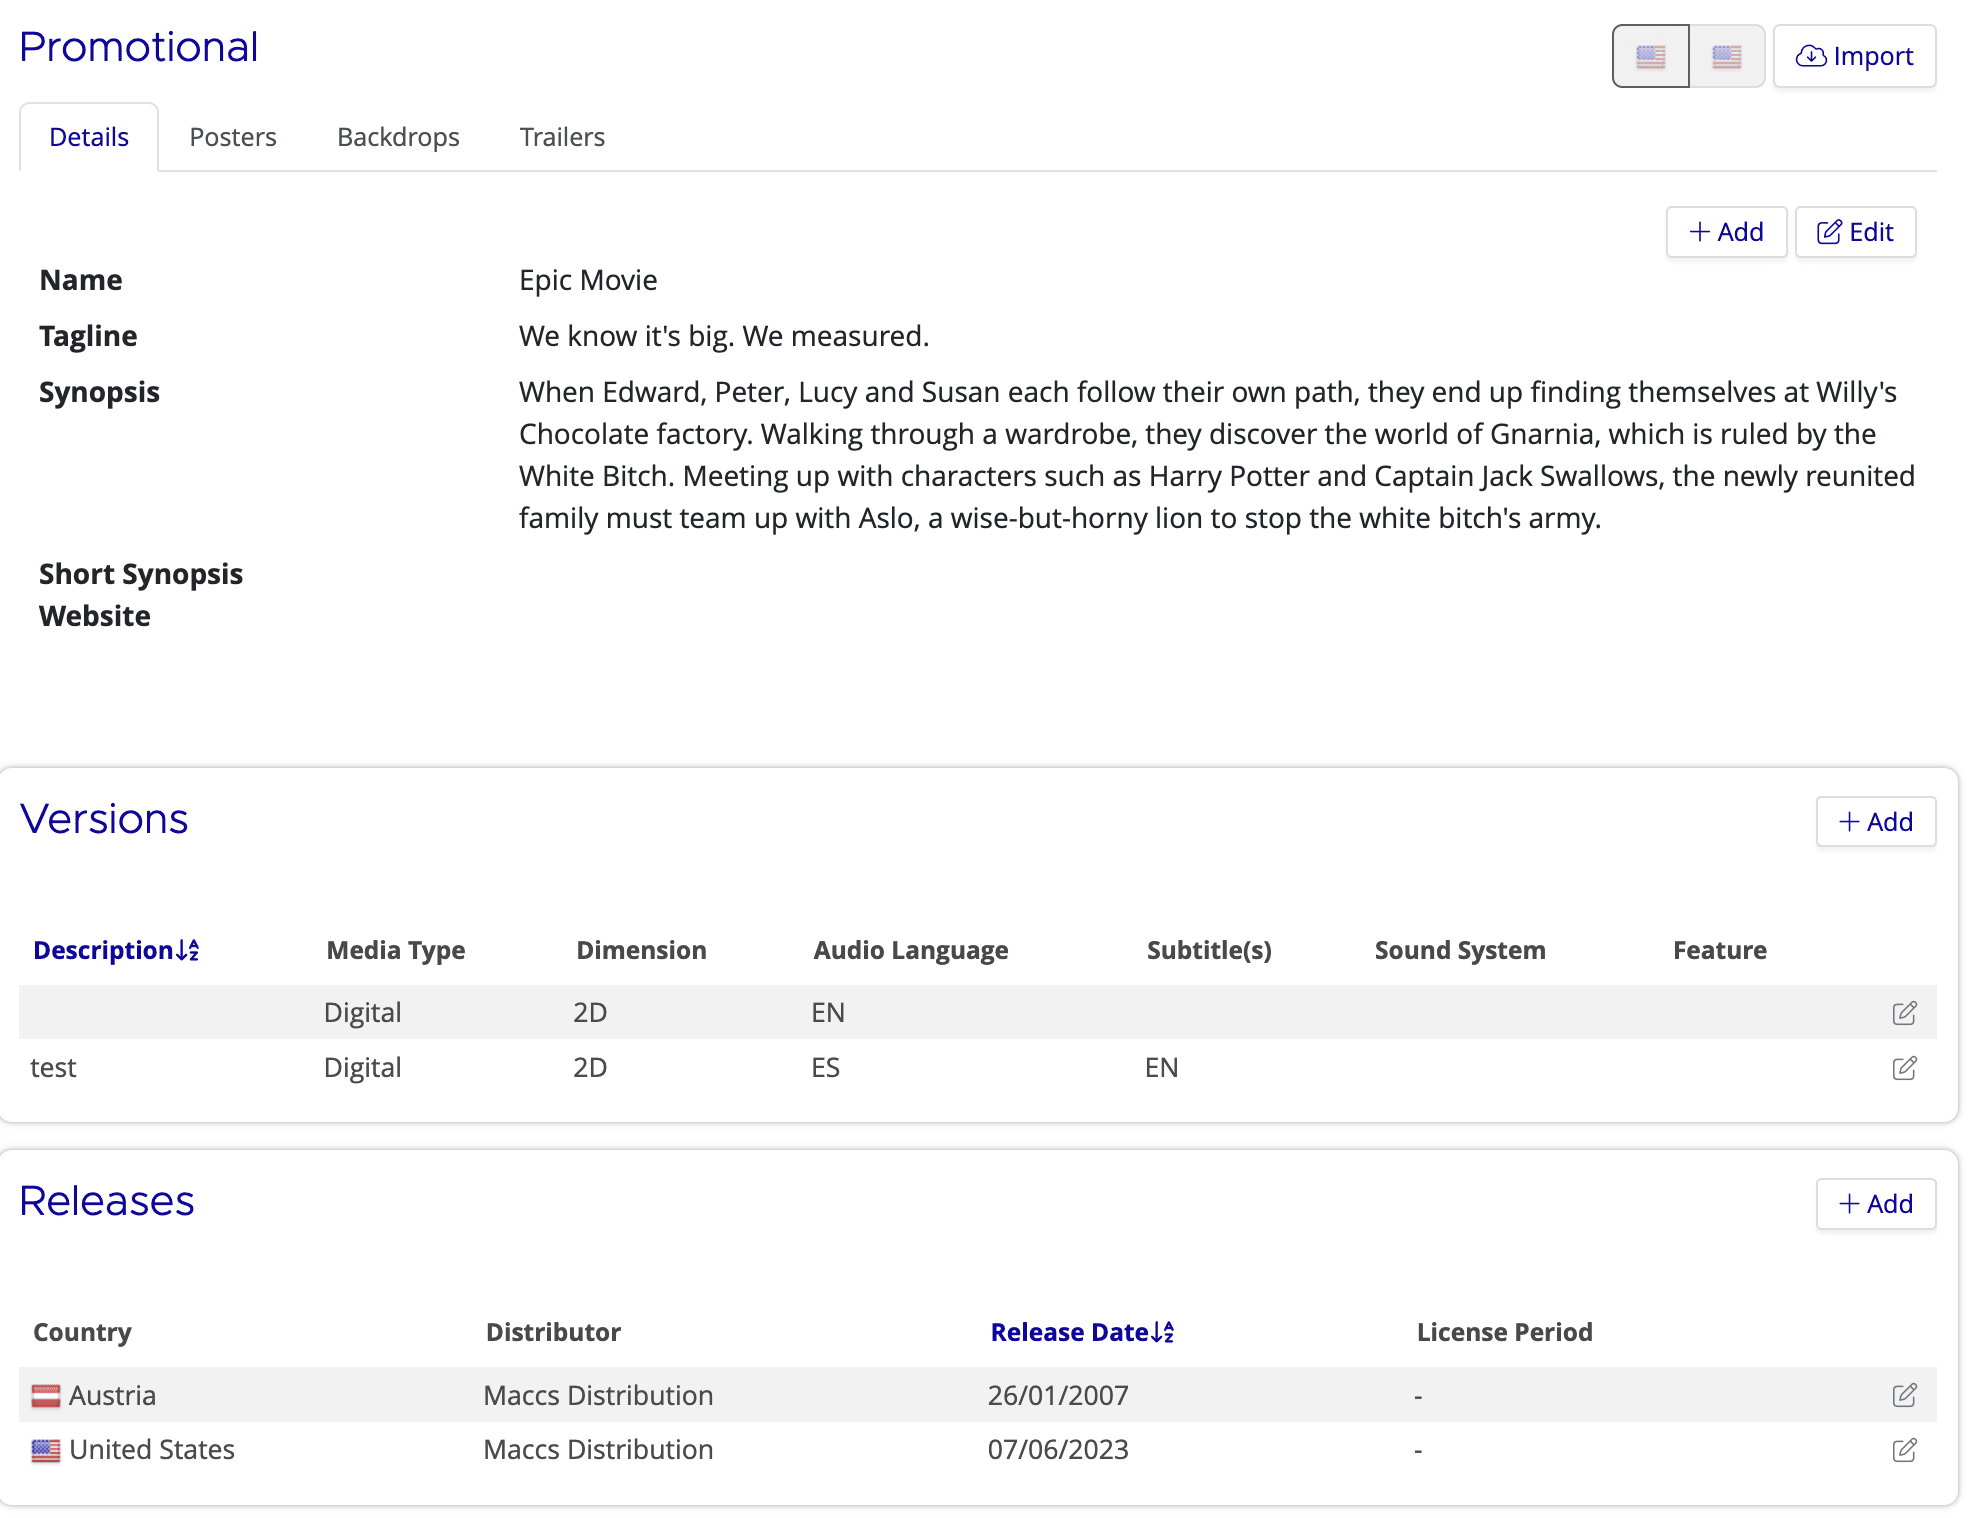
The Production Detail Page
The production detail page is your central hub for managing a film. It shows all the information associated with the production and is divided into several sections:
- Production details — the film's title, poster image, release date, runtime, and genre
- Versions — all format versions created for this production (see Setting Up Versions, Vendors, and Shipping for details on adding and configuring versions)
- Releases — all territory releases, each with its own release date, licensor, rating, and assigned versions
- Promotional Data — imported marketing materials such as posters, trailers, and synopses
Creating a Release
A release represents the distribution of a production in a specific territory. Each release can have its own release date, licensor, rating, and shipping configuration. To create a release:
- Open the production detail page
- In the Releases section, click Add (or use the + Add Release button on the dashboard and select an existing production)
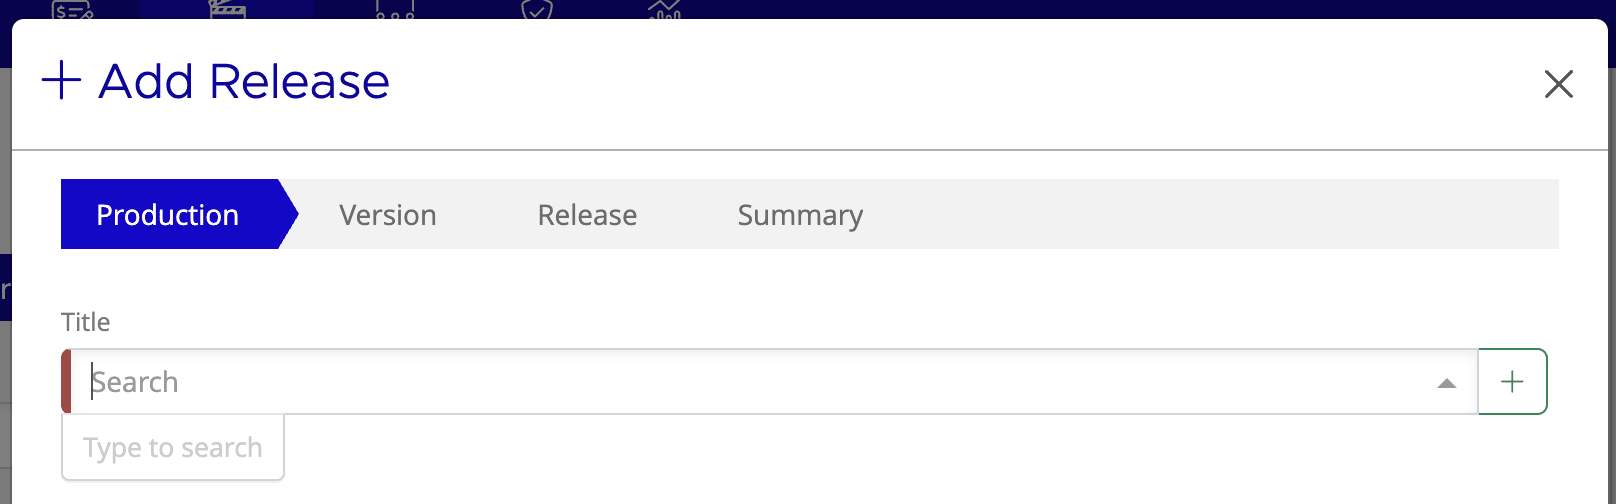
- Follow the wizard steps: Production → Version → Release → Summary
Step 1: Production
If you started from the dashboard, select the production from the dropdown. If you started from a production's detail page, this is pre-filled.
Step 2: Version
Select the version(s) to assign to this release. You can choose from the versions already created at the production level. If the version you need doesn't exist yet, you'll need to add it to the production first (see Setting Up Versions, Vendors, and Shipping).
Step 3: Release
Configure the territory-specific details for this release:
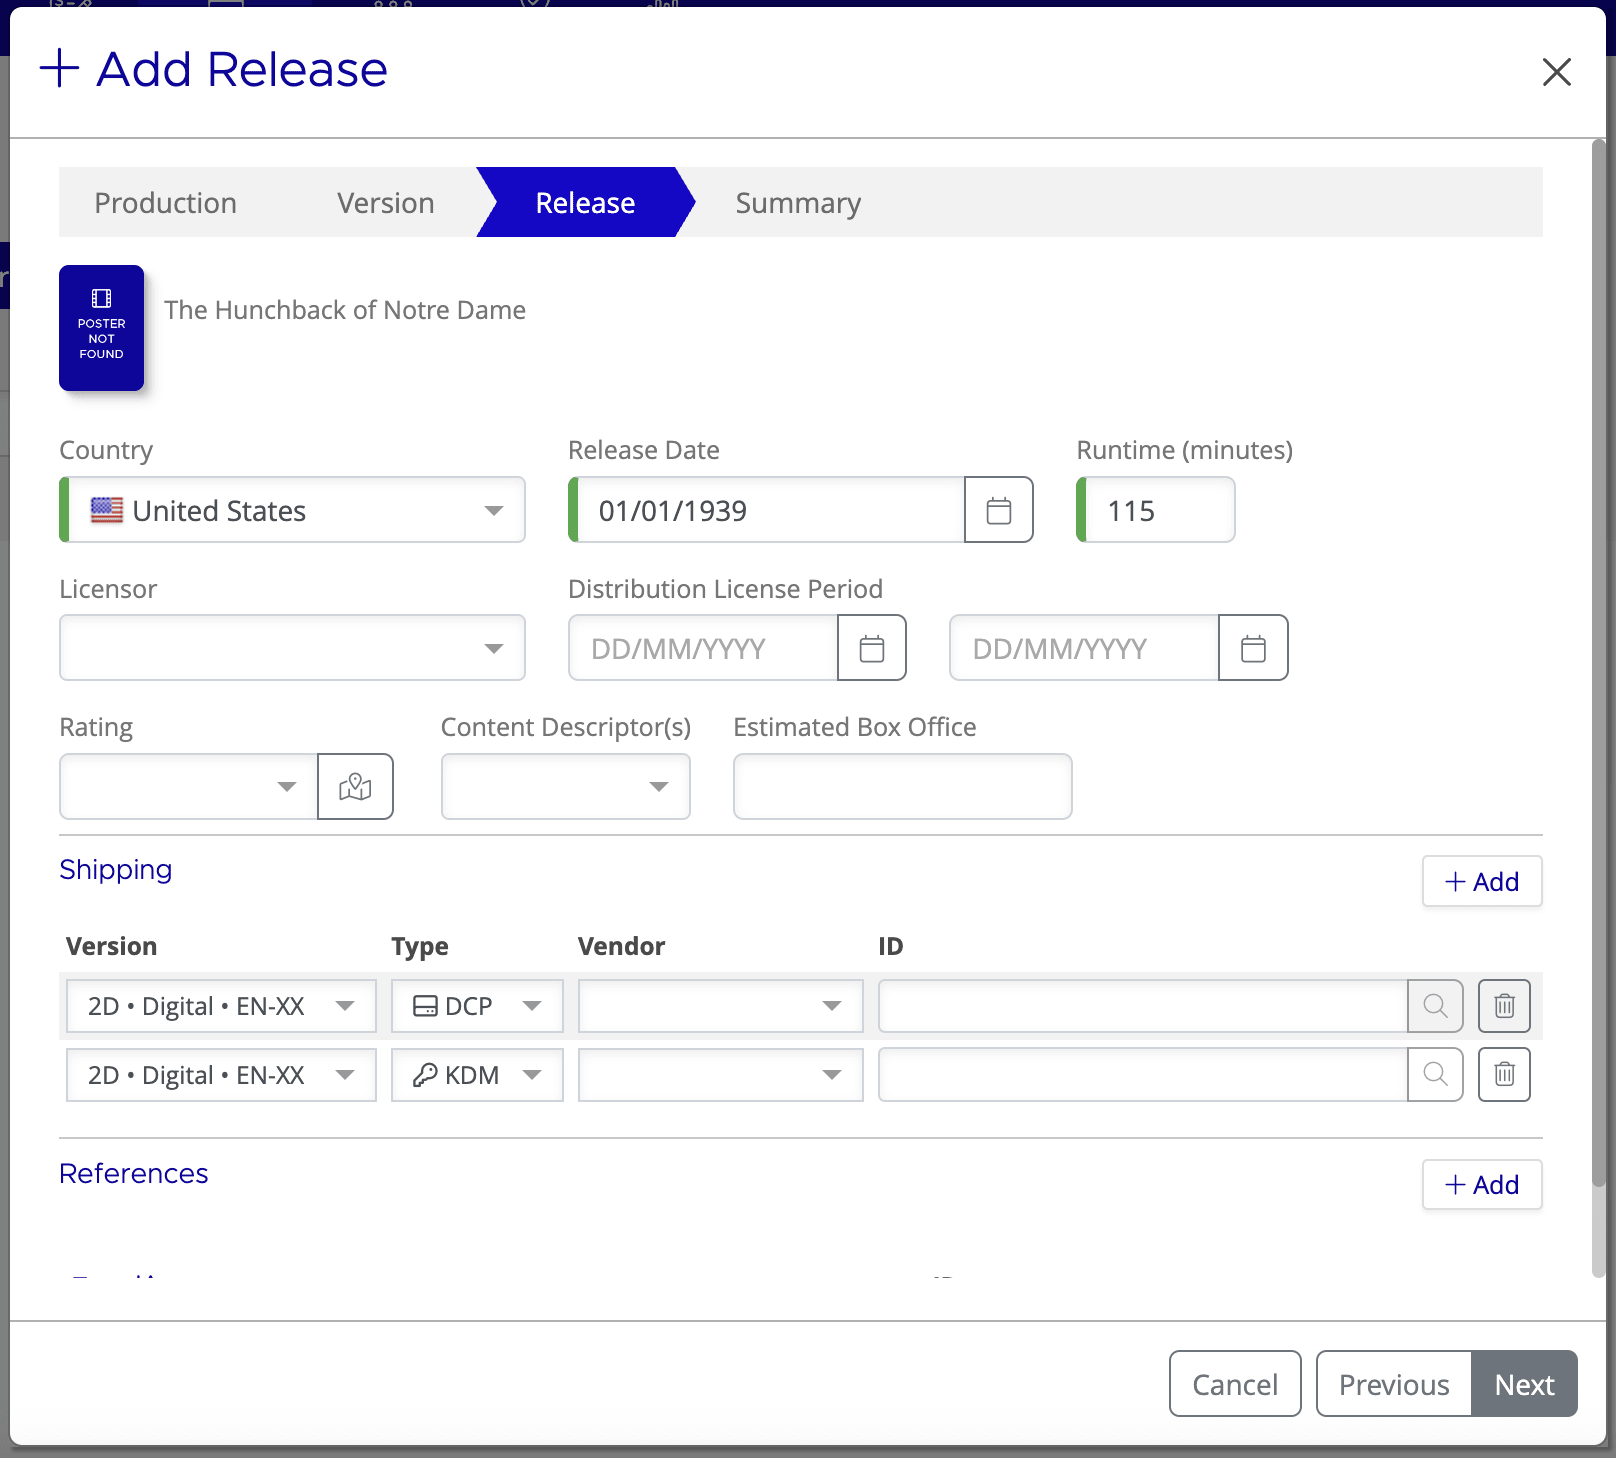
- Country — the territory for this release
- Release Date — the theatrical release date in this territory
- Runtime (minutes) — pre-filled from the production, but can be adjusted per release
- Licensor — the rights holder or licensor for this territory
- Distribution License Period — the start and end dates of your distribution license
- Rating — the local classification or age rating
- Content Descriptor(s) — content warnings or descriptors associated with the rating
- Estimated Box Office — a projected box office figure for planning purposes
The Release step also includes a Shipping section for configuring DCP/KDM vendors and a References section for adding external IDs. For detailed shipping setup instructions, see Setting Up Versions, Vendors, and Shipping.
Step 4: Summary
Review the release details, venue(s), period, and terms. On this final step, you can set the initial booking status to Expected or Confirmed:
- Expected — the booking is created but no DCP/KDM delivery request is sent, and the booking is not exported to MaccsBox
- Confirmed — the booking is created, delivery requests are sent to suppliers, and the booking is exported to MaccsBox
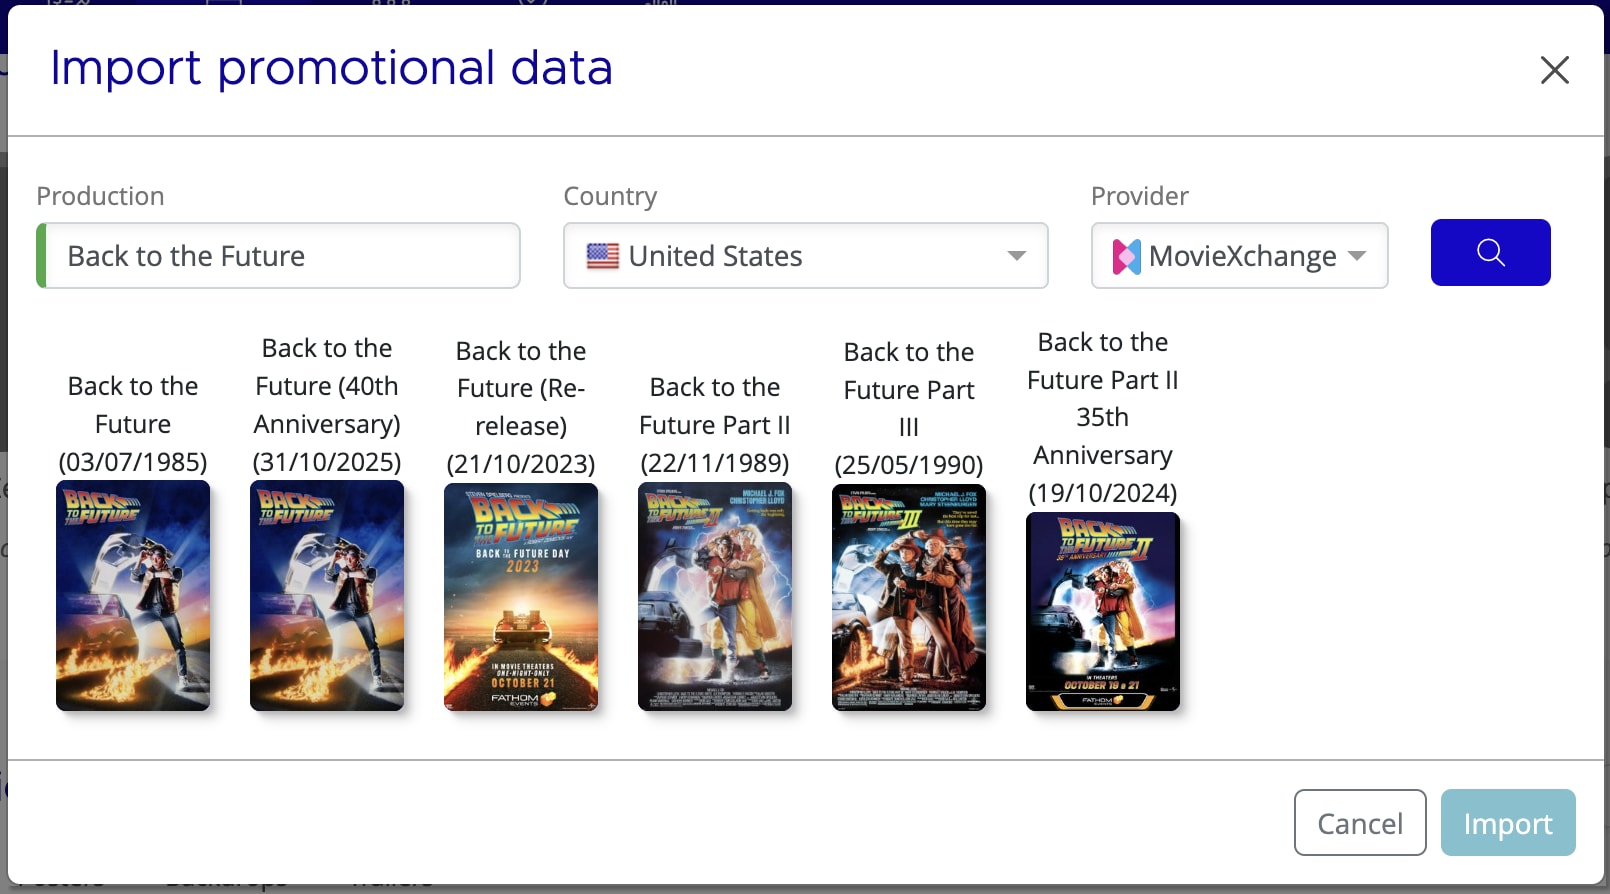
Importing Promotional Data
Mica can import promotional materials (such as posters, trailers, and synopses) from external providers like MovieXchange. To import promotional data:
- Open the production detail page
- Scroll to the Promotional Data section
- Click Import
- Select the Country for territory-specific data
- Select the Provider (e.g. MovieXchange)
- Click the search icon to check if promotional data is available
- If a match is found, click Import to pull the data into Mica
If you need assistance with any aspect of Mica, we're here to help:
Contact your Mica system administrator for organisation-specific questions or access issues
OR
Reach out to the Mica support team at support.mica@maccs.com
How did we do?