Recording Payments
Record, approve, and manage payments from exhibitors in Mica. Covers the Payments page, creating new payment records, the approval workflow, payment details and allocation breakdown, voiding payments, and downloading payment reports.
Payments represent cash received from exhibitors. Recording a payment is the first step in the accounts receivable workflow; allocating it against invoices or bookings comes next. This article covers how to record, review, and manage payments in Mica.
Table of Contents
- The Payments Page
- Recording a New Payment
- Approving a Payment
- Payment Details
- Voiding a Payment
- Downloading a Payment Report
- Next Steps
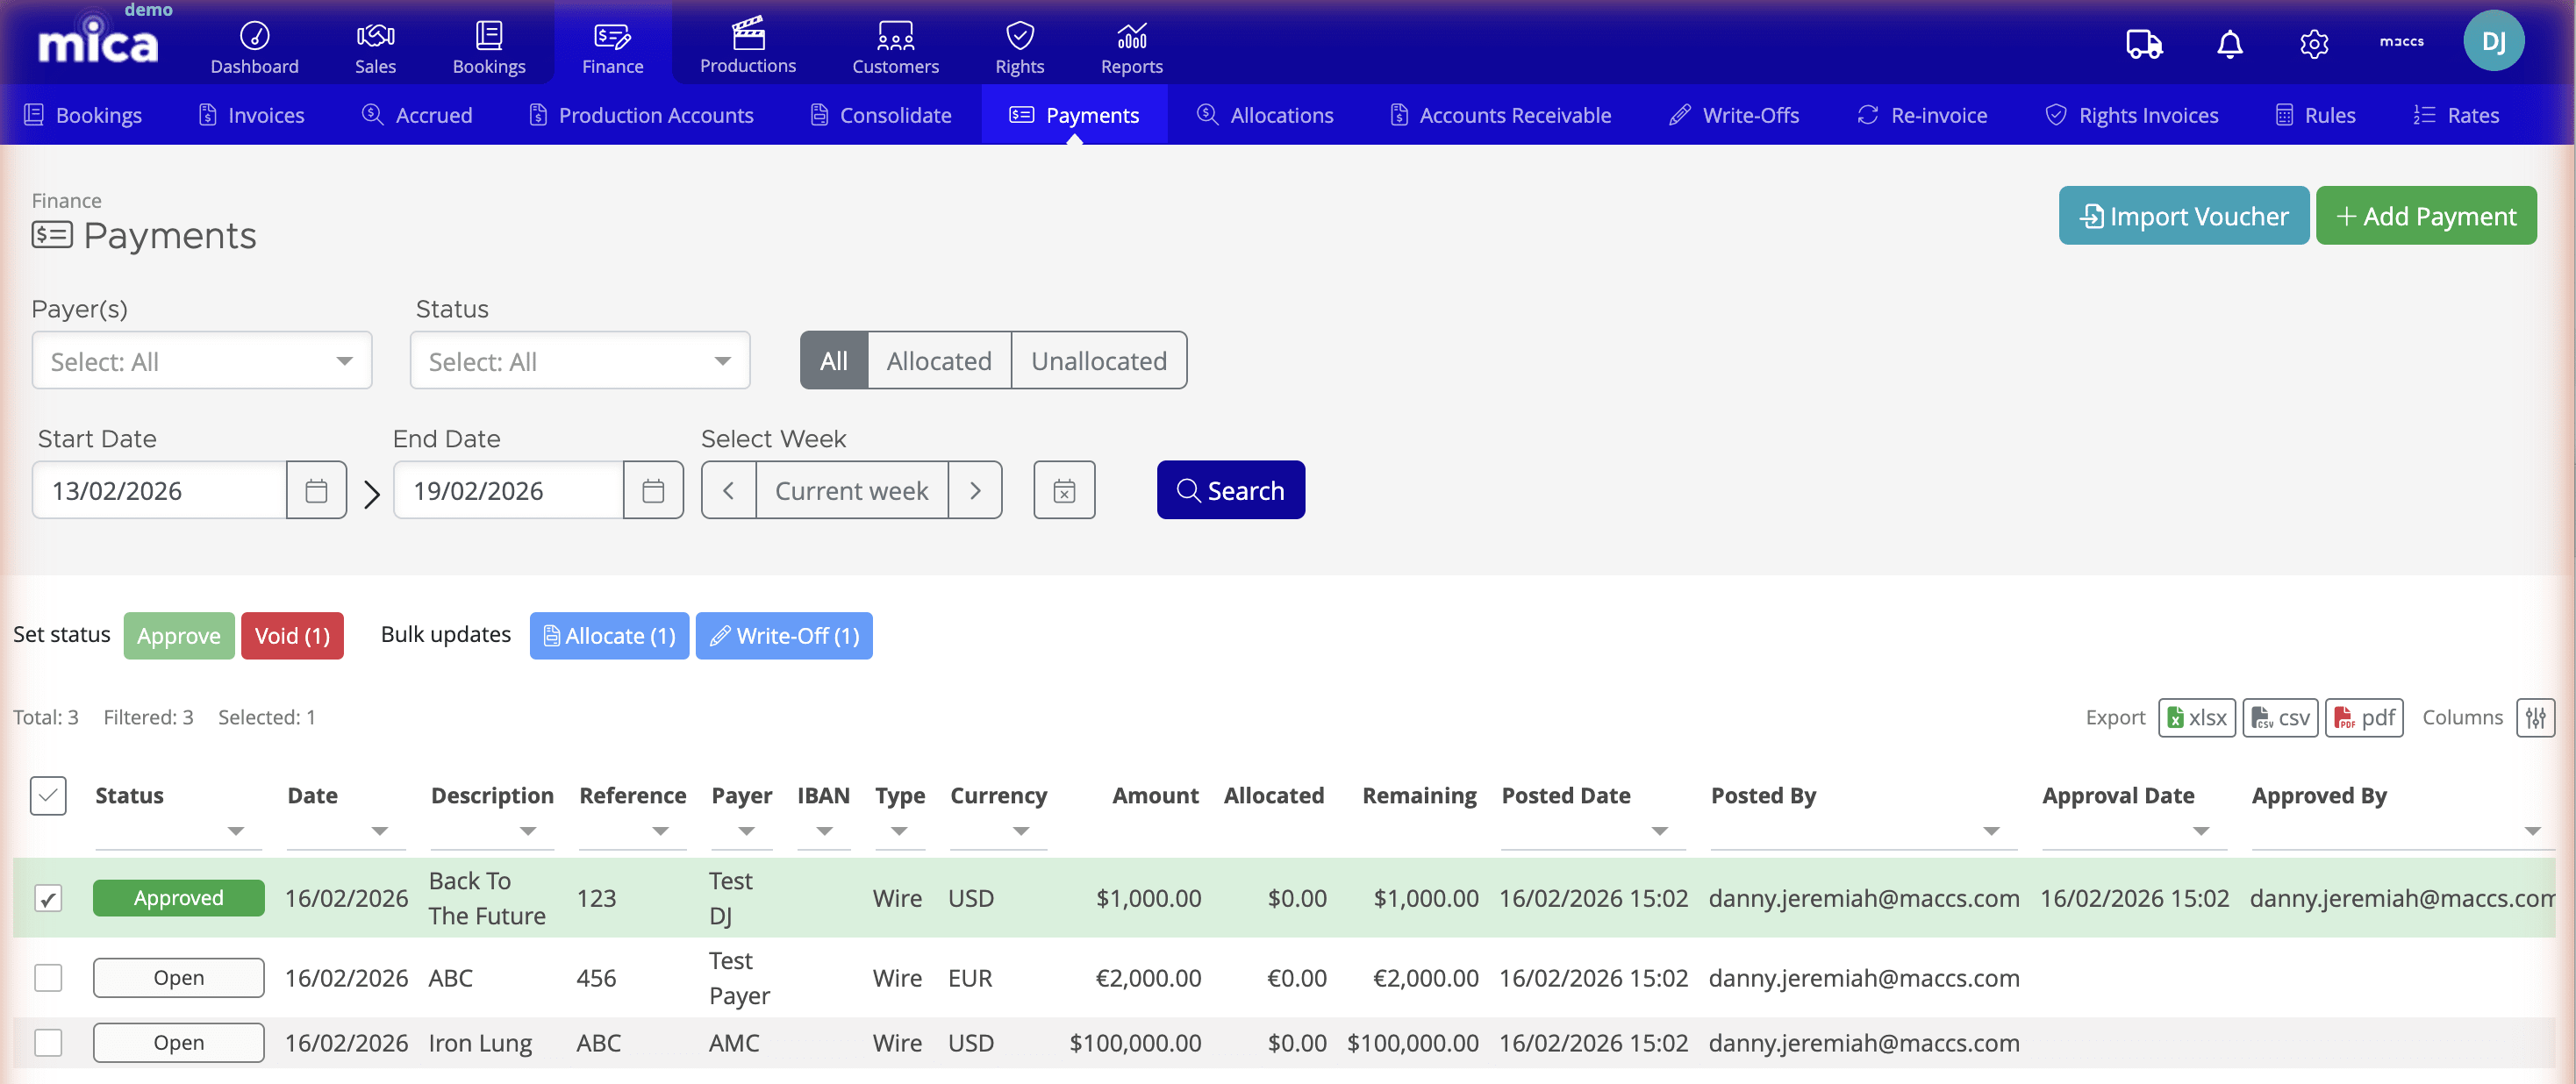
The Payments Page
To access the Payments page, navigate to Finance → Payments. This page displays a list of all recorded payments, along with tools to filter, import, and create new payments.
At the top of the page, you'll find two action buttons:
- Import Voucher — imports eVoucher files from exhibitor chains (covered in a separate article)
- Add Payment — creates a new payment record
Below the action buttons, several filter options help you locate specific payments:
- Payer(s) — filter by the exhibitor or distributor who sent the payment
- Status — filter by payment status (Open, Approved, Allocated, Voided)
- All/Allocated/Unallocated — radio buttons to show all payments, only fully allocated payments, or only payments with available funds
- Start Date and End Date — filter by date range
- Select Week picker — filter by playweek
The payment list shows each payment's payer, date, reference, amount, type, and current status.
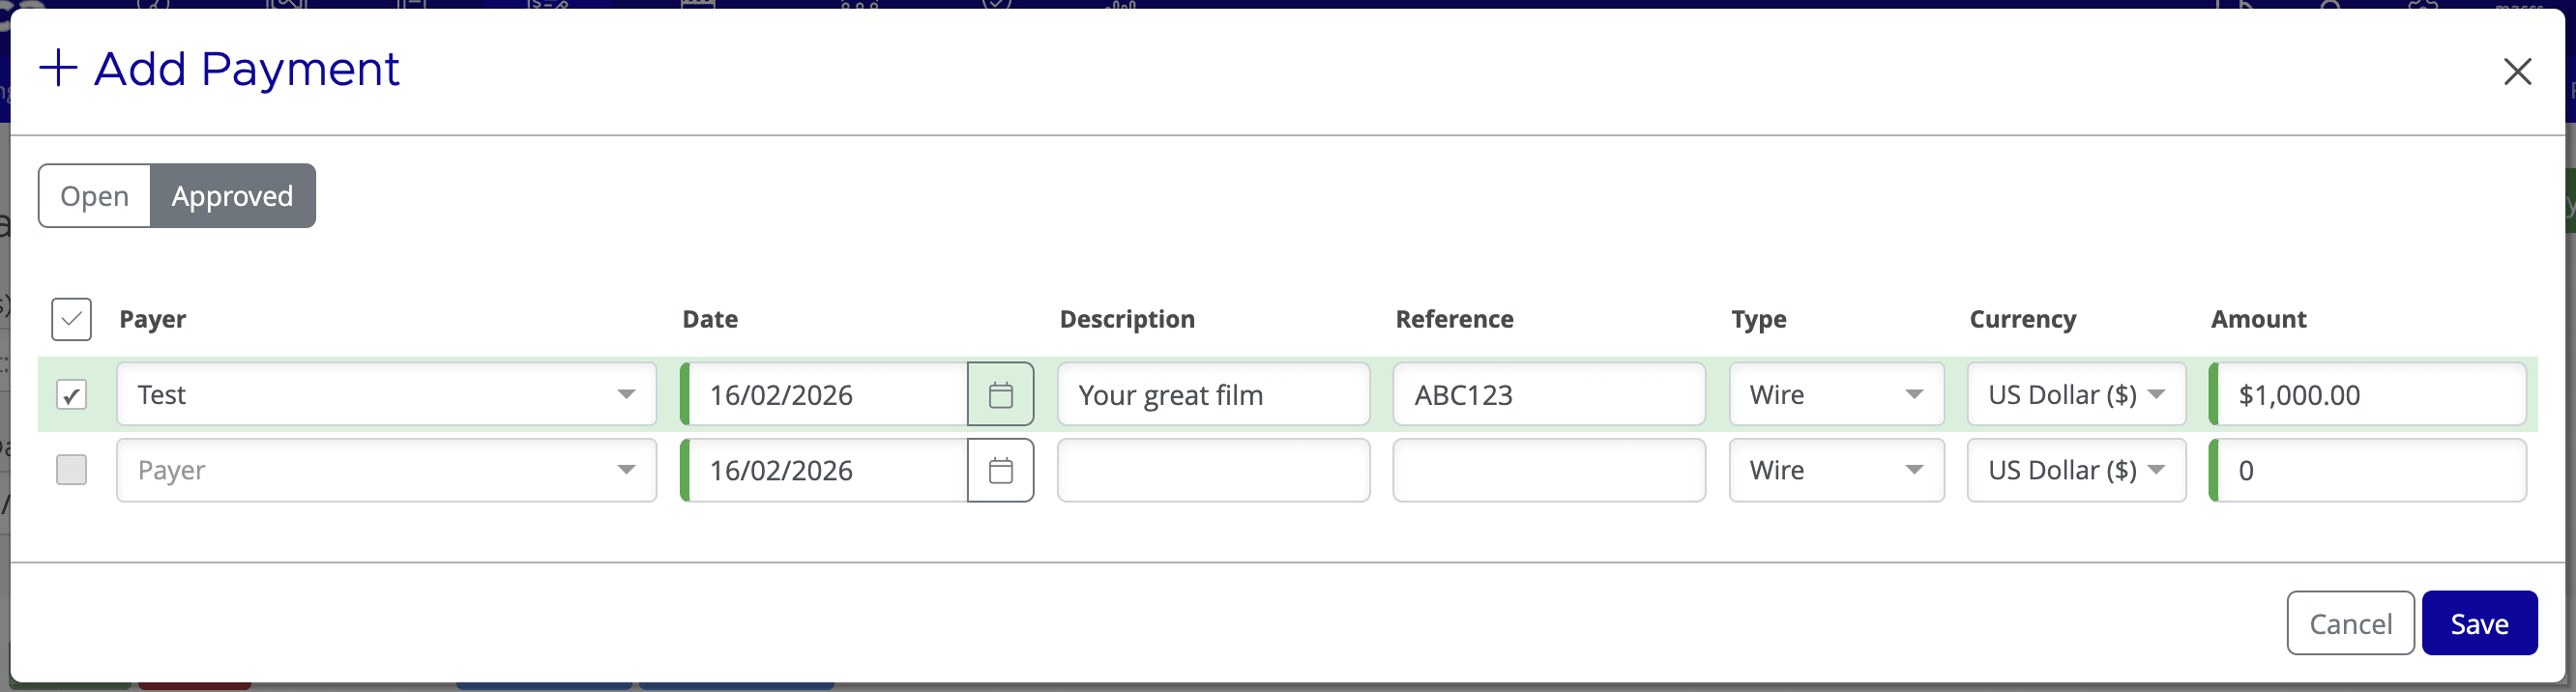
Recording a New Payment
Follow these steps to record a new payment:
- Navigate to Finance → Payments
- Click Add Payment
- Select a Payer from the dropdown. The currency will automatically default to the payer's configured currency
- Enter the Amount received
- Enter the Date the payment was received
- Enter a Reference (e.g., cheque number, wire transfer reference, or internal ID)
- Select the payment Type (e.g., Wire Transfer, Cheque, ACH, eVoucher)
- Optionally enter a Posting Date if it differs from the payment date. The posting date is used for accounting period alignment
- Click Save
After saving, the payment appears on the Payments page with status Open. This means the payment has been entered but is not yet approved — for example, a cheque has been received but has not yet cleared. The payment must be approved before it can be allocated.
Approving a Payment
A newly recorded payment has status Open, which means it has been entered but cannot yet be allocated. Before funds can be distributed to invoices or bookings, the payment must be approved — for example, once a cheque has cleared or a wire transfer has been confirmed.
To approve a payment, open the Payment Details page and click Approve. The status changes to Approved and the payment's funds become available for allocation.
Payment Details
Click any payment row on the Payments page to open the Payment Details page. This page shows the complete payment record and its allocations.
At the top of the page, a summary section displays the payment information:
- Payer
- Date (the date the payment was received)
- Reference (cheque number, wire reference, or internal ID)
- Amount (the total payment received)
- Type (Wire Transfer, Cheque, ACH, eVoucher)
- Status (Open, Approved, Allocated, or Voided)
- Posting Date (for accounting period alignment, if set)
Below the summary, an allocation breakdown shows how the payment has been distributed:
- Allocated — total amount matched to invoices or bookings
- Written Off — amount written off (e.g., withholding tax, FX adjustments)
- Refunded — amount returned to the payer
- Available — remaining unallocated balance
A detailed allocation table lists every individual allocation with the production name, venue, playweek, amount allocated, and timestamp of the allocation.
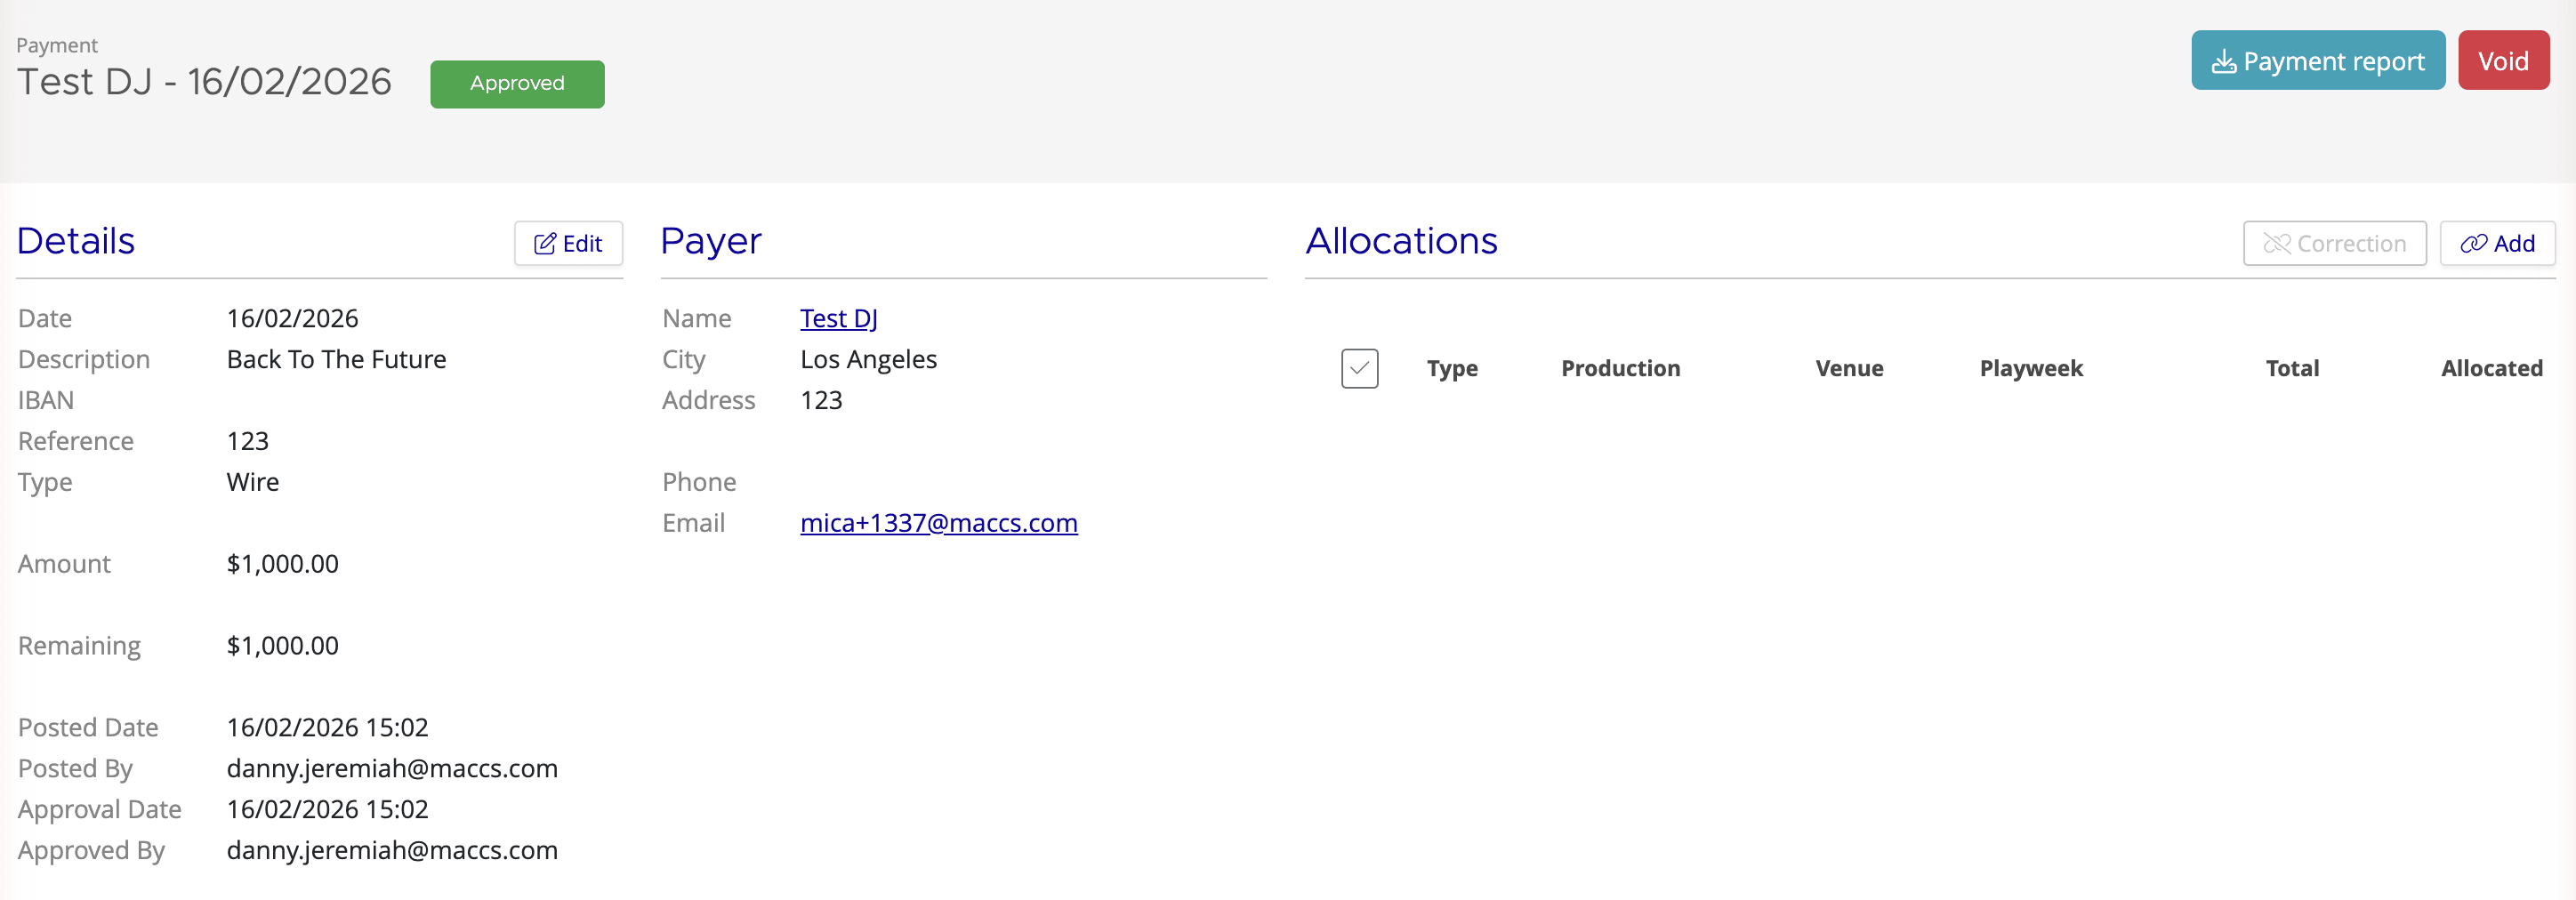
Voiding a Payment
To void a payment (for example, to correct a duplicate entry or remove a returned cheque), open the Payment Details page and click Void.
Once voided, the payment shows status Voided and is excluded from all financial totals and reports.
Downloading a Payment Report
From the Payment Details page, click Download Payment Report to generate a PDF summary of the payment and all its allocations.
The report is useful when exhibitors request documentation of how their payments were applied across invoices or bookings, and can serve as a formal record for your records.
Next Steps
Once a payment is recorded and approved, the next step is to allocate it. The allocation workflow depends on your distributor's configuration:
- Allocating Payments to Invoices — for distributors using the invoice-based model
- Allocating Payments to Bookings — for distributors using the open-ended booking model in the USA and Canada
- Payment Statuses — quick reference for all payment states
If you need assistance with any aspect of Mica, we're here to help:
Contact your Mica system administrator for organisation-specific questions or access issues
OR
Reach out to the Mica support team at support.mica@maccs.com
How did we do?
Quick Guide: Adding a Xero Reference