Managing Users
Add and manage users in Mica. Covers navigating to user management, creating new users, assigning roles (Administrator, User, Booker, and more), setting up connections and permissions, and configuring authentication and security settings.
Mica's user management lets you control who has access to your distribution account and what they can do. You can add new team members, assign roles, and manage permissions from the Subscription settings.
Table of Contents
- Navigating to User Management
- Adding a New User
- User Details and Profile
- Understanding Roles
- Connections and Permissions
- Authentication and Security
Navigating to User Management
The Users page lives within your Subscription settings. To get there:
- Click your profile initials in the top-right corner
- Select Subscription from the dropdown menu
- Click the Users tab from the row of tabs at the top of the page
The Users page displays a table of all users on your account, showing their login email, first and last name, active status, and last login date. A Total Users counter at the top shows how many users are currently registered.

Adding a New User
To add a new user to your Mica account:
- Navigate to your profile initials → Subscription → Users
- Click the Add button above the users table
- Fill in the user's details in the Add User dialog (see below)
- Click Save to create the user
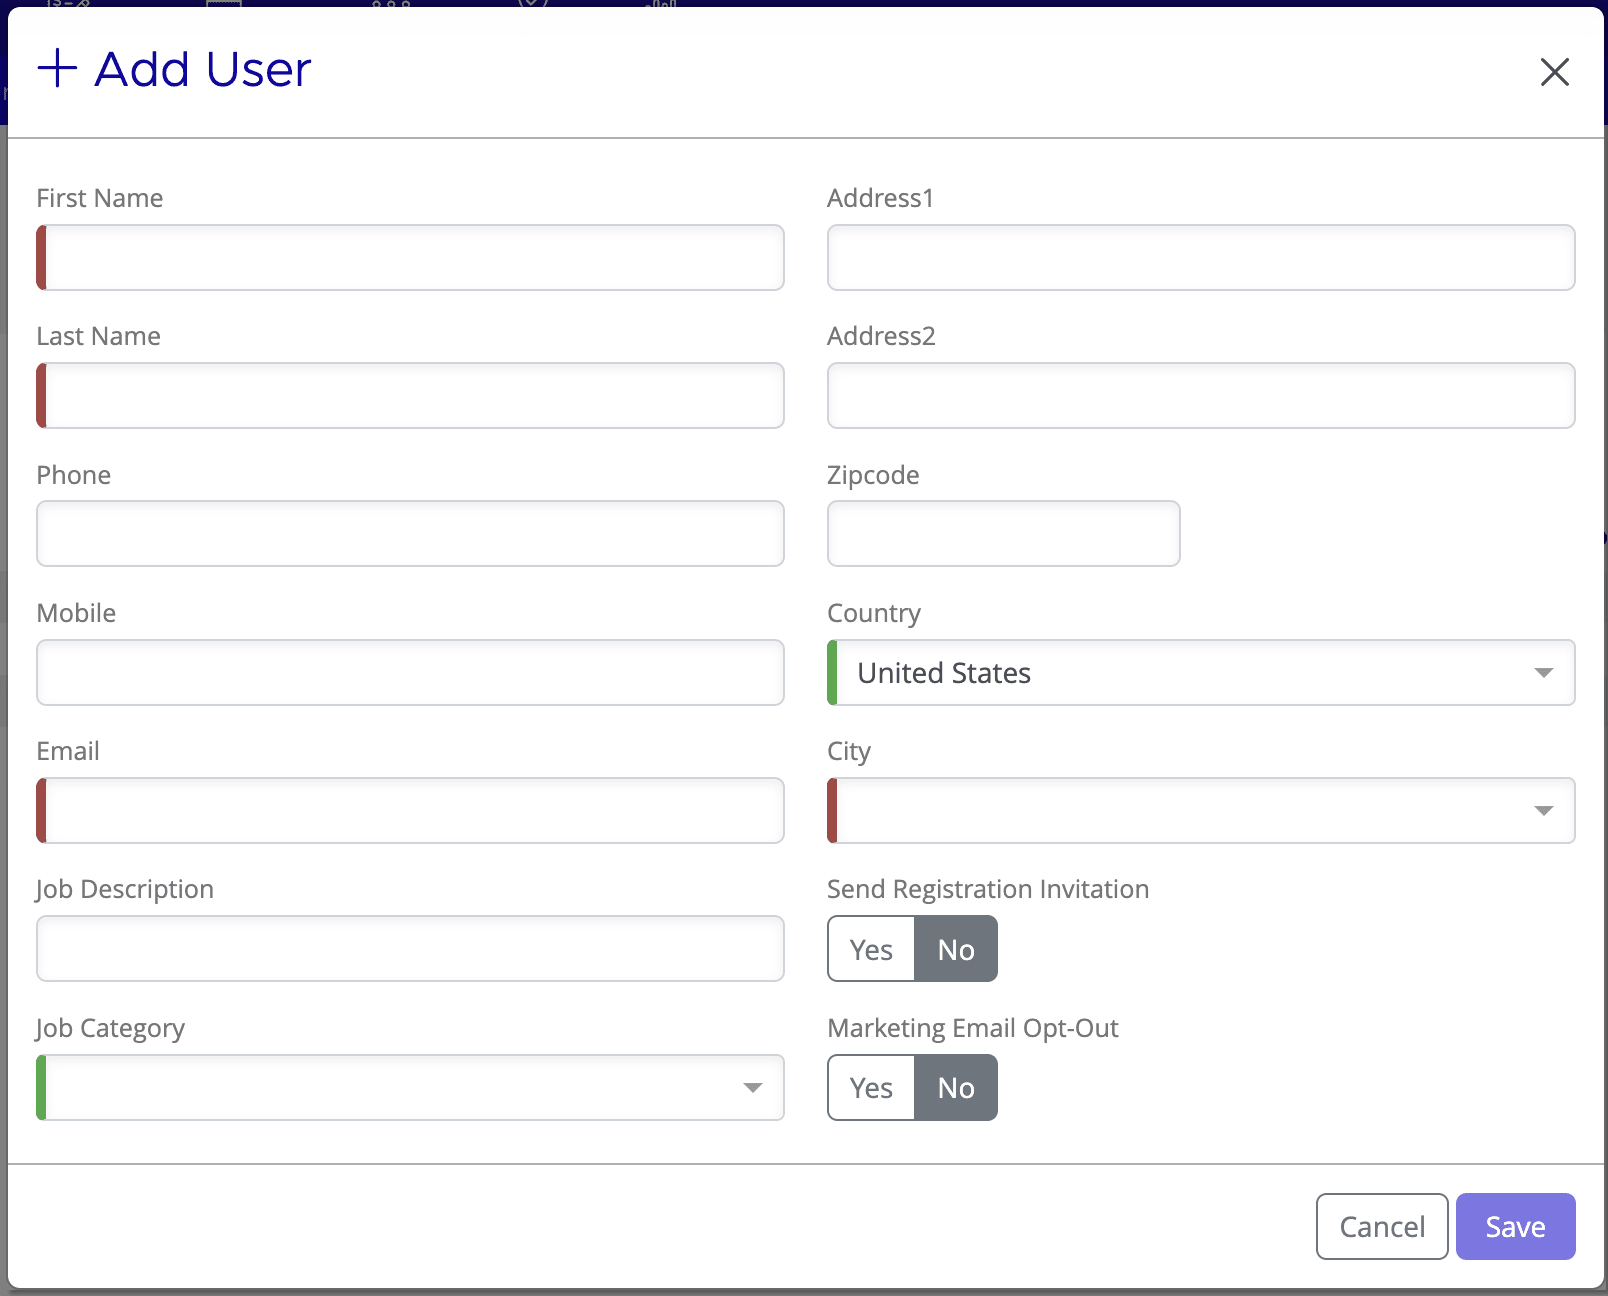
Required and optional fields
The Add User form includes the following fields:
- First Name and Last Name — the user's full name
- Phone and Mobile — contact numbers (optional)
- Email — the user's email address, which also becomes their login
- Job Description — a free-text field for the user's role or title (optional)
- Job Category — select from: Billing, Booker, Buyer, Manager, Marketing, Owner, or Sales
- Address fields — Address 1, Address 2, Zipcode, Country, and City (optional)
- Send Registration Invitation — set to Yes to email the user a registration link immediately, or No to send it later
- Marketing Email Opt-Out — set to Yes if the user should not receive marketing communications
User Details and Profile
Click any user in the users table to open their detail page. The detail page is divided into four sections: Details, Authentication, Connections & Permissions, and Write-off Thresholds.
Details section
The Details section shows the user's personal and contact information. Click Edit to update any of these fields. You can also upload or remove a profile image at the top of the page.
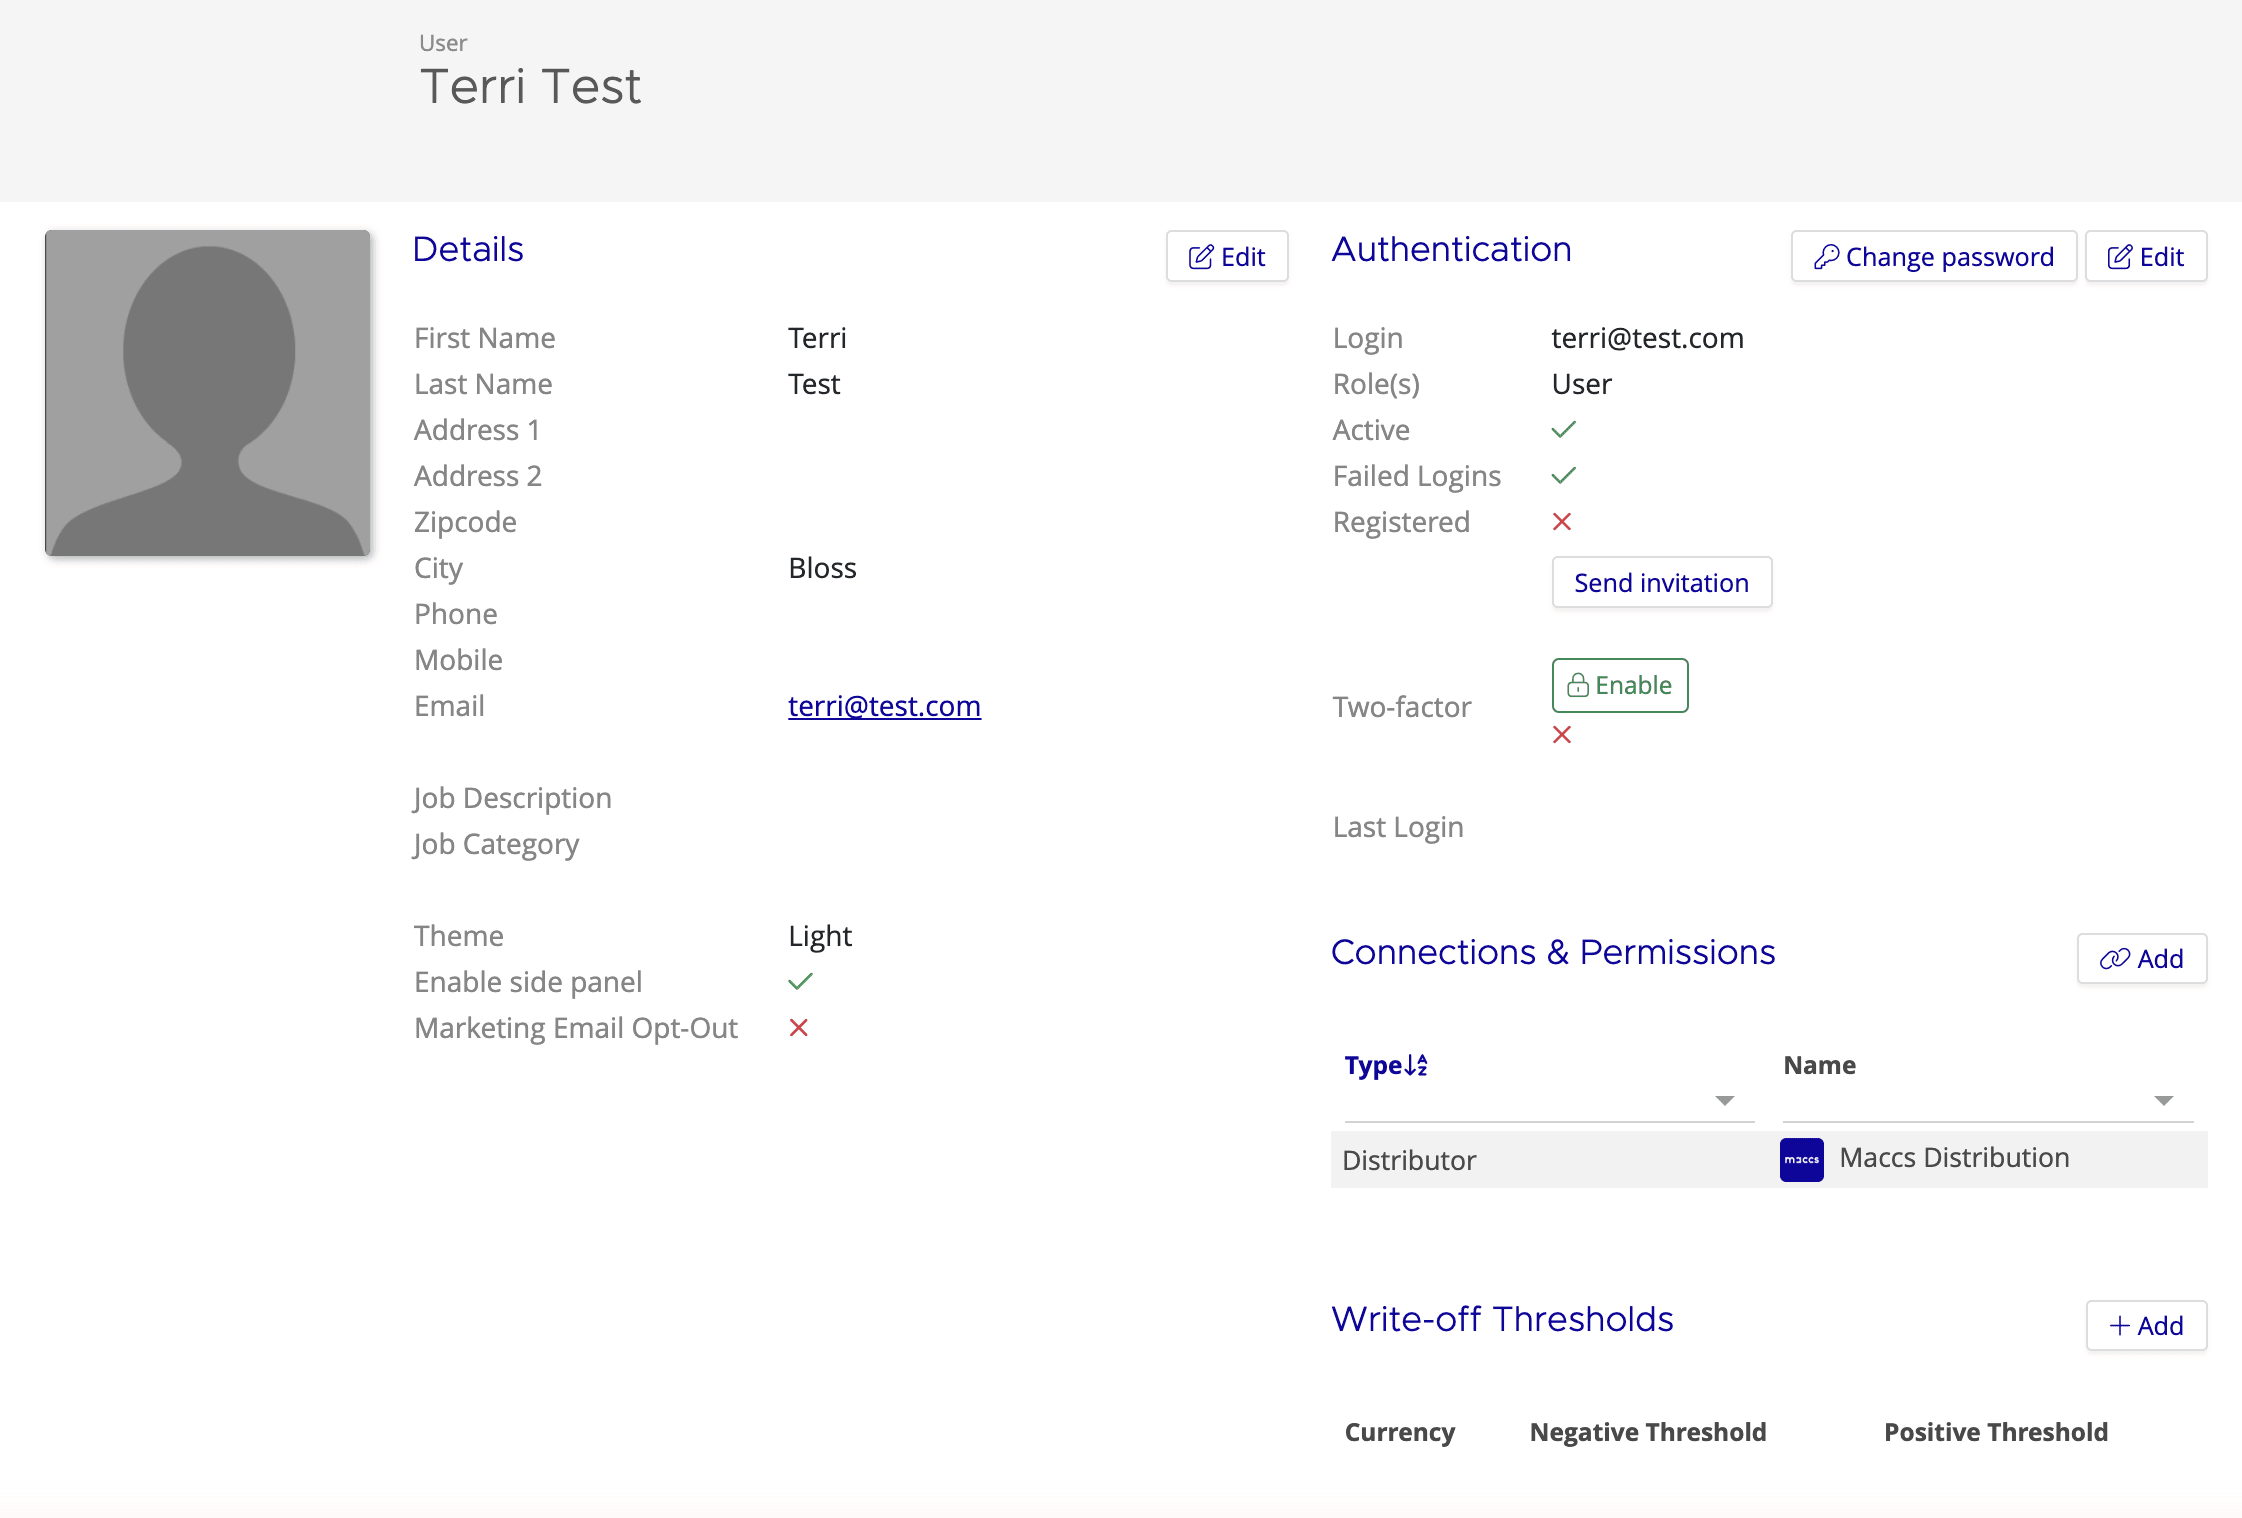
In addition to the fields from the Add User form, the detail page includes:
- Theme — the user's preferred display theme (light or dark)
- Enable side panel — toggles the side navigation panel
Understanding Roles
Every user in Mica is assigned the User role, which provides standard access to day-to-day features such as bookings, invoices, and productions. This is the only role you can assign when managing your own users.
Other roles (such as Administrator, API, and Monitoring) are managed by the Mica team and can't be assigned from your account. If you need a different role for a team member, contact Mica support.
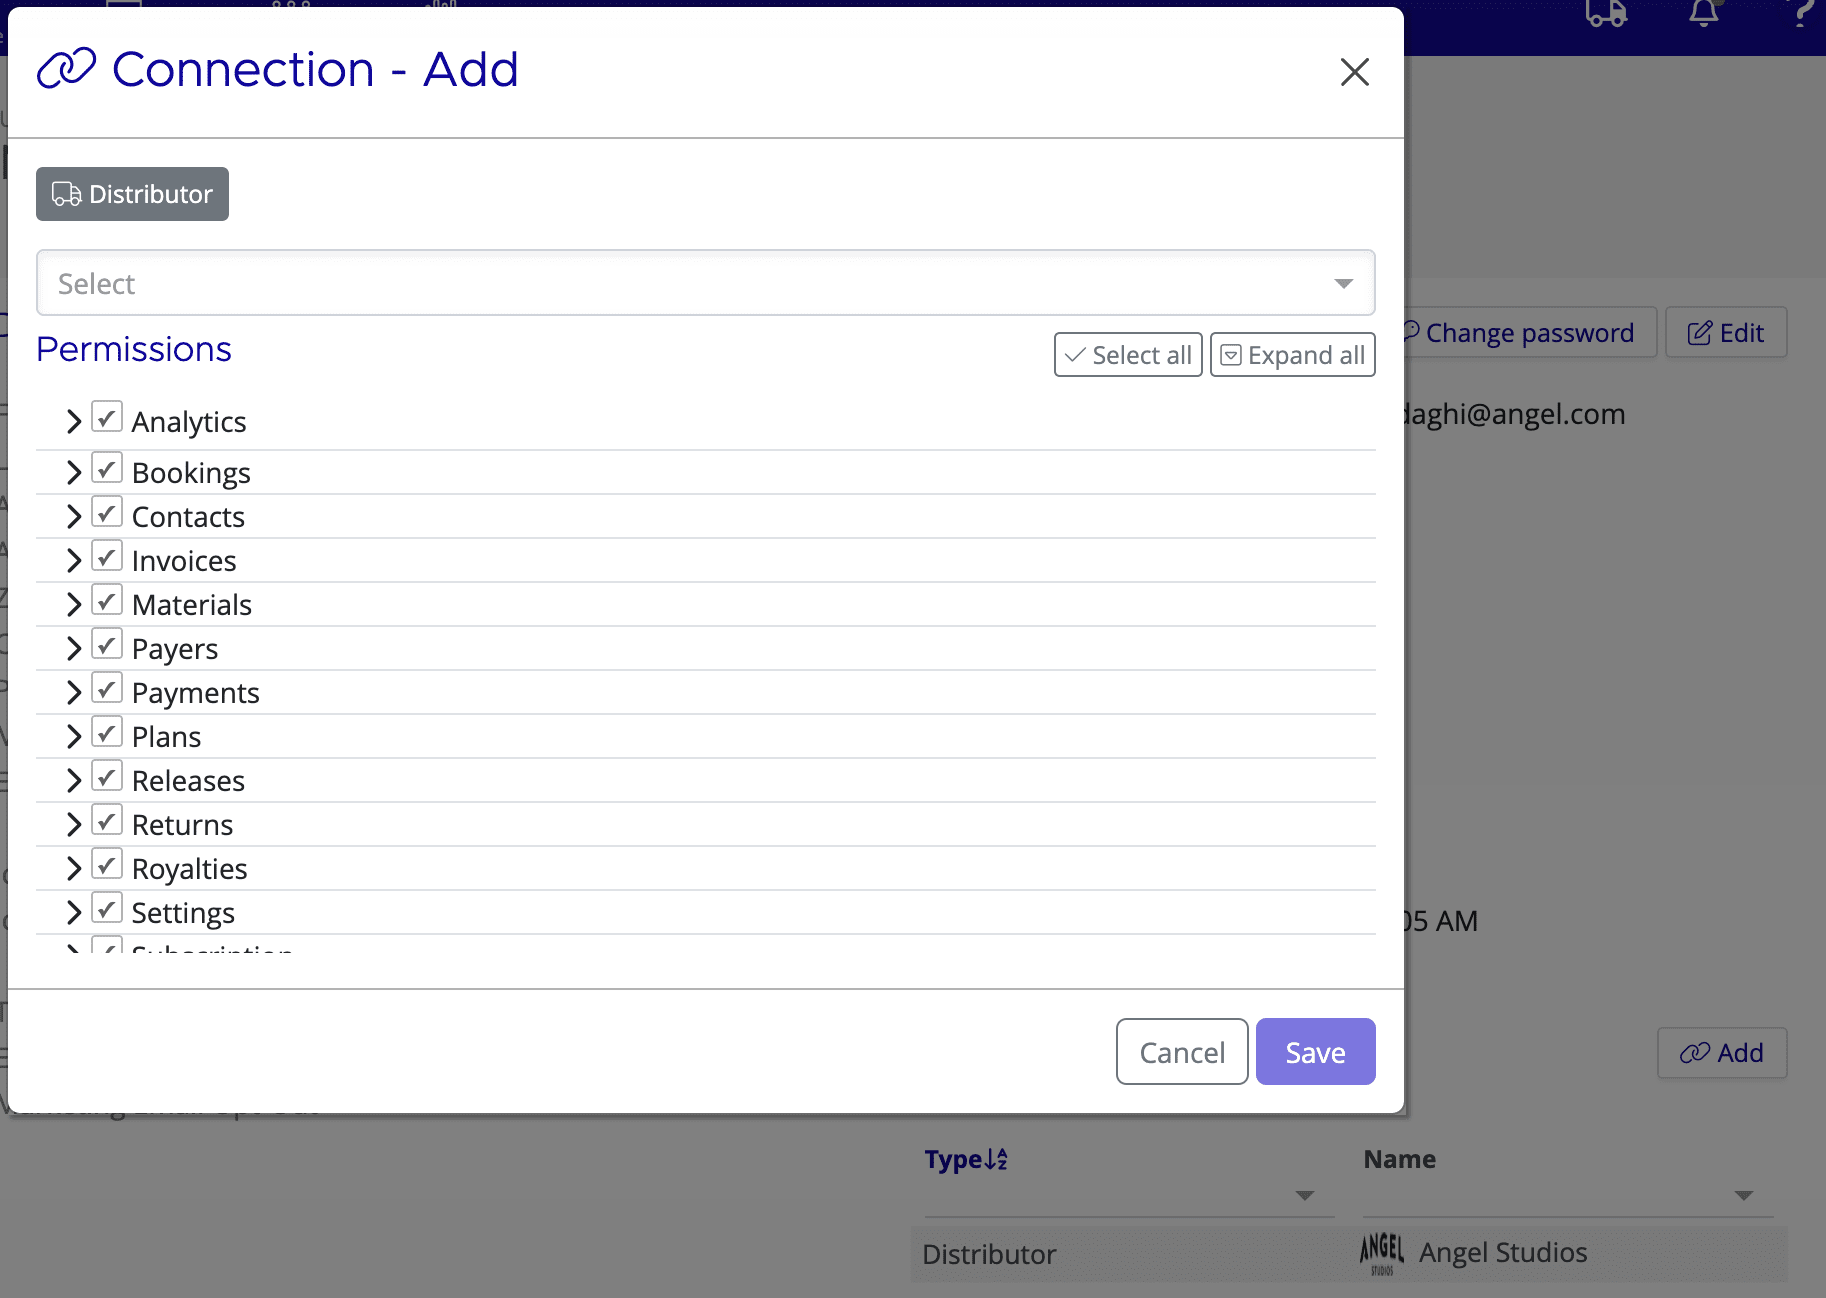
Connections and Permissions
The Connections & Permissions section links a user to one or more distributors. This controls which distributor's data the user can access.
To add a connection:
- Open the user's detail page
- Scroll to the Connections & Permissions section
- Click Add
- Select Distributor from the Type dropdown
- Select the distributor name from the Name dropdown
Authentication and Security
The Authentication section on a user's detail page manages login credentials and security settings.
- Login — the email address used to sign in (set automatically from the Email field)
- Active — whether the account is currently enabled
- Failed Logins — tracks unsuccessful login attempts
- Send invitation — sends (or resends) the registration email to the user
- Two-factor — enables two-factor authentication for additional security
- Change password — allows an administrator to reset the user's password
If you need assistance with any aspect of Mica, we're here to help:
Contact your Mica system administrator for organisation-specific questions or access issues
OR
Reach out to the Mica support team at support.mica@maccs.com
How did we do?
Managing Contacts
Managing Venues