Quick Guide: Adding a Xero Reference
Quick step-by-step guide to adding a Xero tracking code reference to a release in Mica for invoice export integration.
Updated
by Danny Jeremiah
If your organisation uses Xero for accounting, you can link each release in Mica to a Xero tracking category. This ensures that when invoices are exported from Mica, revenue is automatically categorised by film in Xero — no manual entry required.
This is a quick-start guide. For full details on all supported providers and how references work, see Adding External References.
Steps
- Navigate to Productions and click the production containing the release you want
- In the Releases section, click the edit icon next to the release
- In the Edit Release dialog, scroll down to the References section (below Shipping)
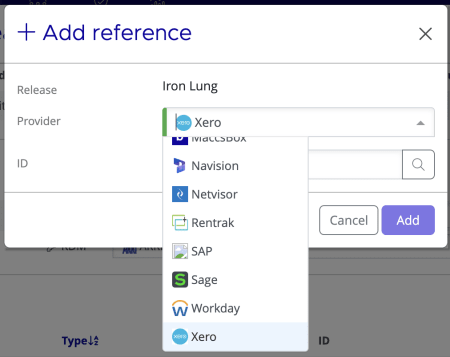
- Click + Add
- Select Xero from the Provider dropdown
- Enter the Xero tracking category name in the ID field
- Click Add
- Click Save on the Edit Release dialog to confirm
The ID must match the tracking category name in Xero exactly — including spelling and capitalisation. If it doesn't match, exported invoices won't be categorised correctly.
Once saved, all future invoices exported for this release will include the Xero reference automatically.
If you need assistance with any aspect of Mica, we're here to help:
Contact your Mica system administrator for organisation-specific questions or access issues
OR
Reach out to the Mica support team at support.mica@maccs.com
How did we do?
Production Accounts
Recording Payments